Blender allows you to use image files in various use cases ranging from creating environments with HDRIs, to image texture maps to photos that just require a little editing. Therefore there are many ways to import images into Blender, depending on the image used for.
To import an image into the image editor, open up the image editor and select the open button in the panel header, not the new button. This will open up the file browser in a new window allowing you to locate, select, and import an image file like a PNG into the image editor.
This is just one area of Blender where you can import image files, as the tool is so useful that it is replicated in other areas of Blender 3D, such as the 3D viewport and the node editor.
What Image File Formats Can Be Imported Into Blender?
There are various use cases for images in a 3D application like Blender, and so there are many areas within Blender where we can use images, and they are not always for the same purpose.
Because of Blender’s ability to use images in various forms, it needs to be able to import various image types so that they can be used.
Thankfully Blender 3D is compatible with many of the universal image file formats, a list of which you can see below.
- Jpeg
- PNG
- TiFF
- Jpeg2000
- Open EXR
- WebP
- Iris
- BMP
- Targa
- Radiance HDR
- Cineon
How To Import An Image Into The Image Editor?
With so many different areas of Blender requiring images, we will cover how to import your image files in as many areas of Blender as possible.
The first area is the image editor, which is a panel used for BOTH UV editing and texture painting. This means that images here can take the form of UV maps for texture application.
Alternatively, some artists will use the texture panel to display the image as reference material.
To import an image file, press the open file located in the header of the image editor.
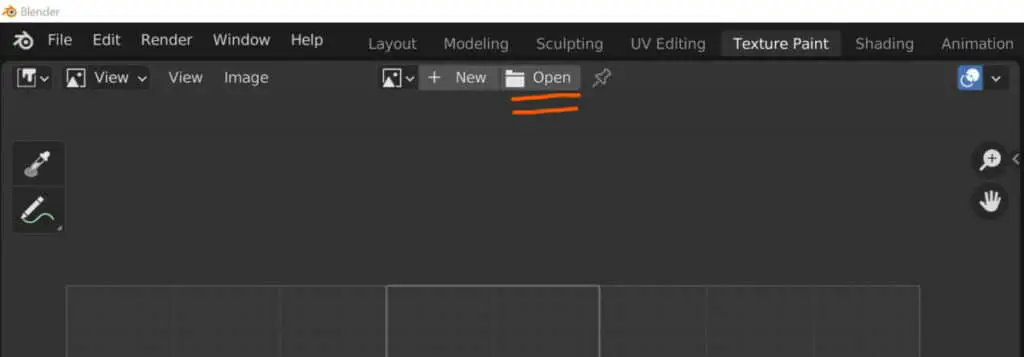
This will open up a new window for the file browser, allowing you to search for the image you want to import.
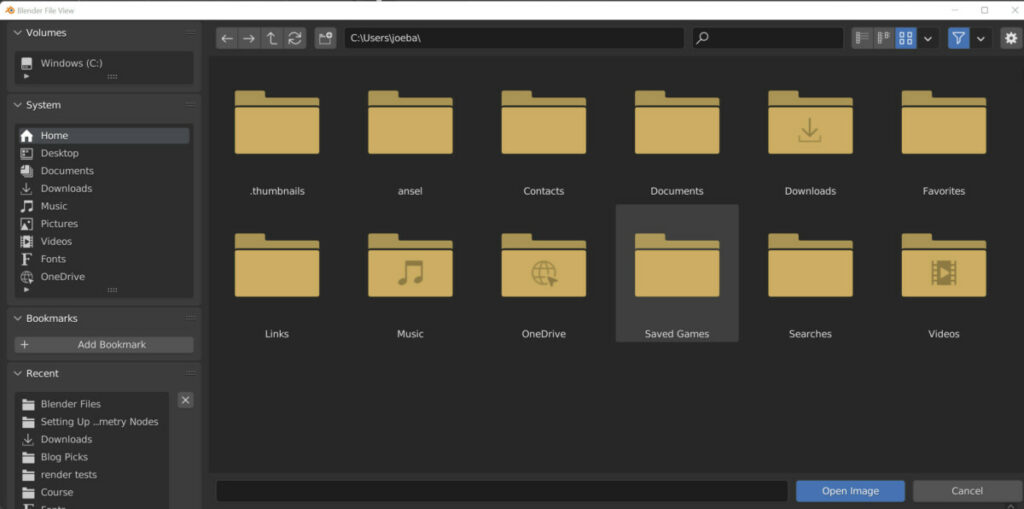
Once located, select the image file with the left mouse button so that it highlights Blue, and then select the Blue button labeled Open Image to bring it into your image editor.
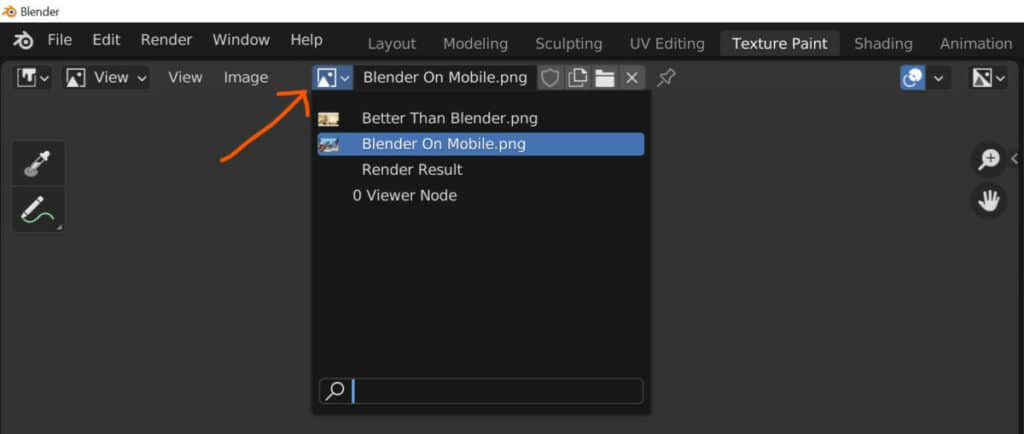
The image will now appear in the editor. To switch between imported images, press the arrow button new to New to open up the menu for selecting images.
How To Import An Image In The 3D Viewport?
Another way that we can import images is within the 3D viewport itself. The imported image can be used as either reference material or as a background image.
The practical difference between these two forms and the settings used to edit them is negligible. The only real difference is when you move a model behind the reference image, the model will no longer be physible.
However, if you move a model behind a background image based on your viewpoint, The models’ geometry will still be visible as if it were in front of the image.
To add an image file to the 3D viewport, open the add menu using Shift + A. Then select the image option from the menu and choose either reference or background.
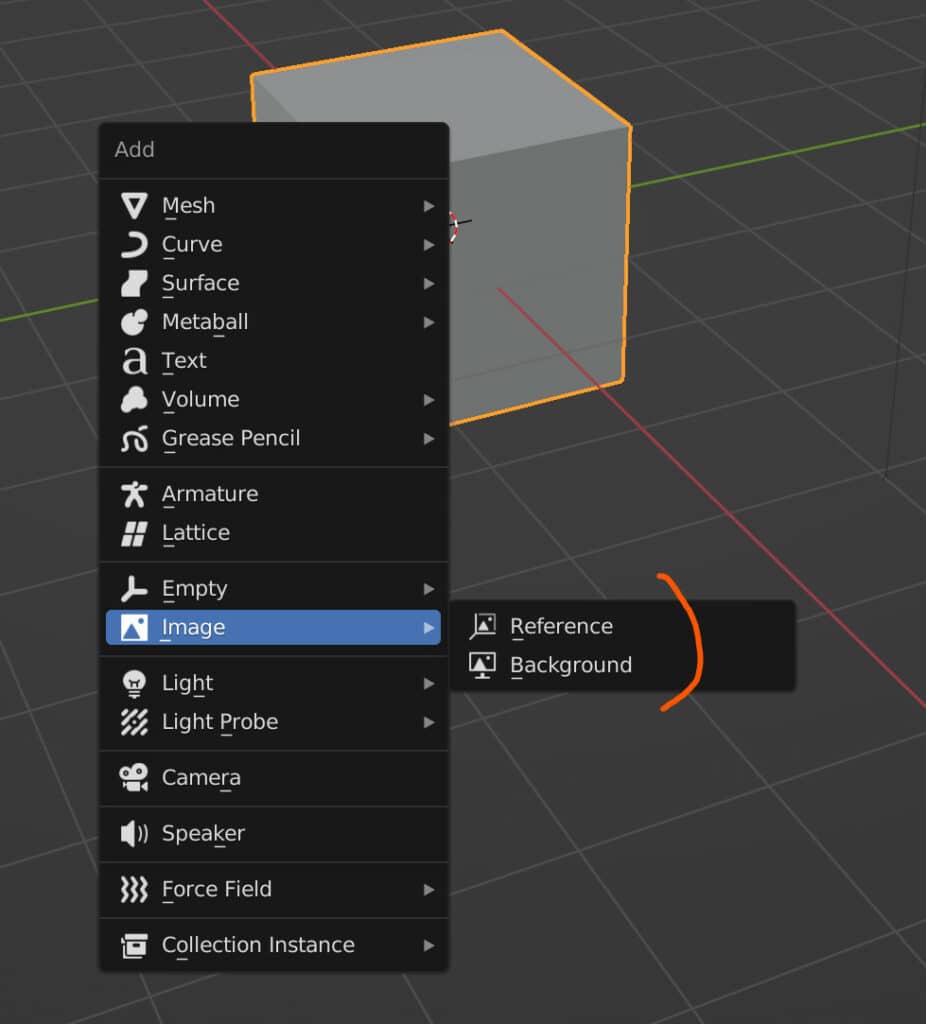
Again this will open up the file browser, as all of these methods will do. Select your image and then press the blue button to import it into your scene.
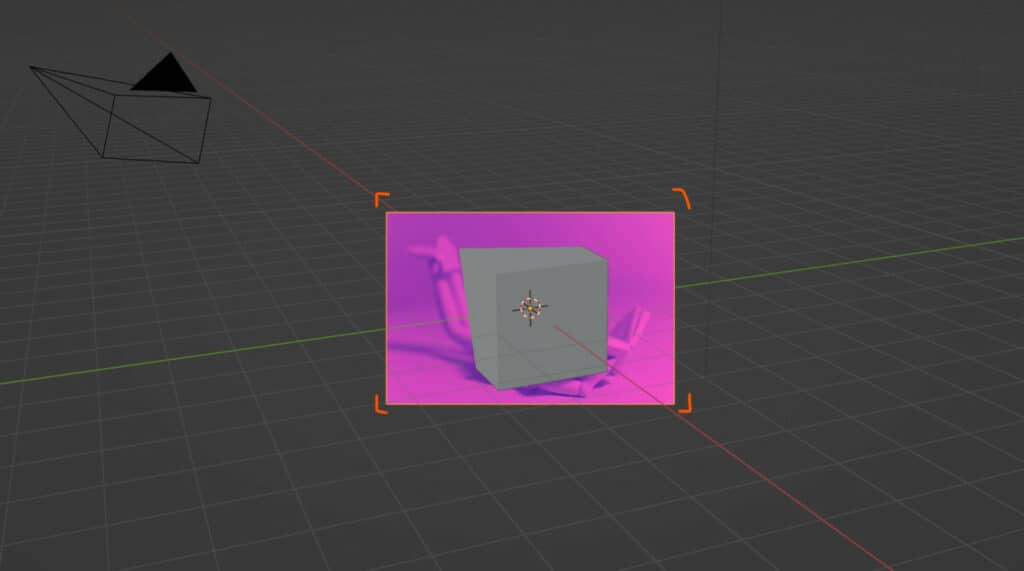
Note that the angle of your view when you import the image will determine the image angle, as it will face the viewport camera directly.
There is an add on known as images as planes, which will allow you to import an image as a simple plane object where the image is applied to the plane as a texture.
The add on will need to be enabled, so go to the properties panel and then add-on. Type import image into the search bar, select images as planes and then close the preferences.
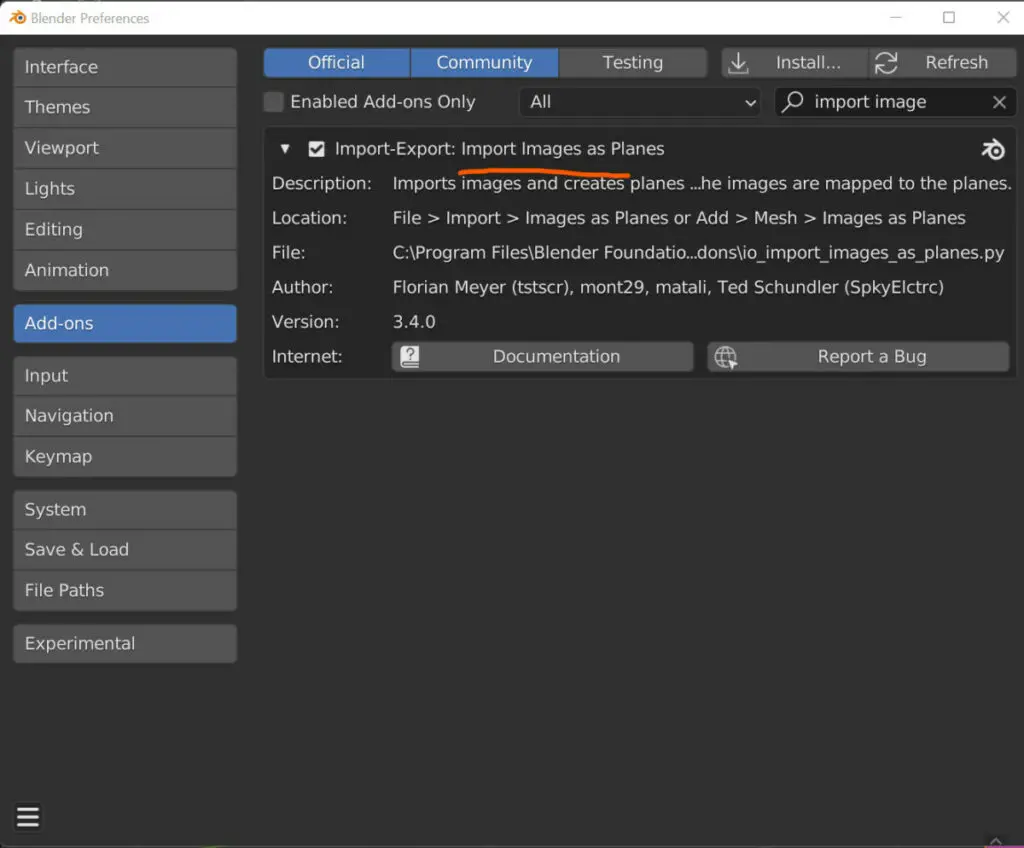
The new option will be found in the add menu with the other two image types.
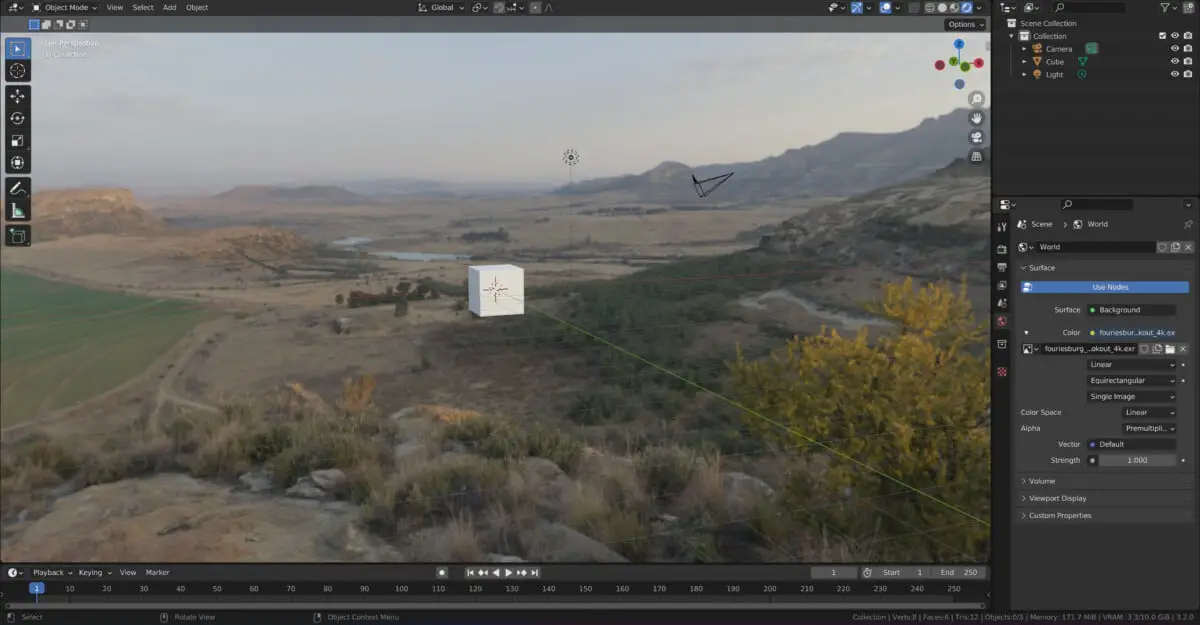
How To Import An Image As A HDRi?
There are particular image files known as HDRi’s, which exist as spherical environmental textures that are used to provide an actual environment and rudimentary scene lighting to the project.
To add an HDRi, go to the world tab in the properties panel. For the color option, select the yellow button to replace the base world color with a texture.
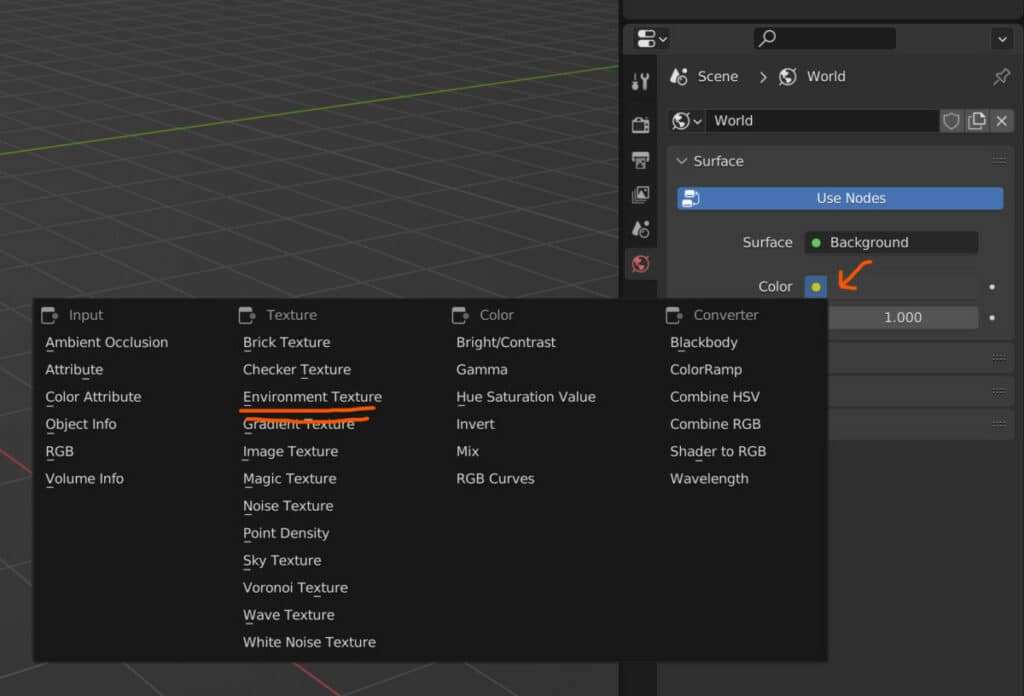
From the menu, select the environmental texture and then open up the file browser again to locate and import your HDRi image.
Note that this image is only displayed in rendered view of the 3D viewport.

How To Import An Image As A Texture?
When creating PBR materials, we often use image textures as the base of that material, this means we need to import image files into our shader node editor.
To import an image as a texture, add an image texture node and connect it to the base color of the main shader.
In the image texture node, select the open option to open the file browser and locate the image texture you want.
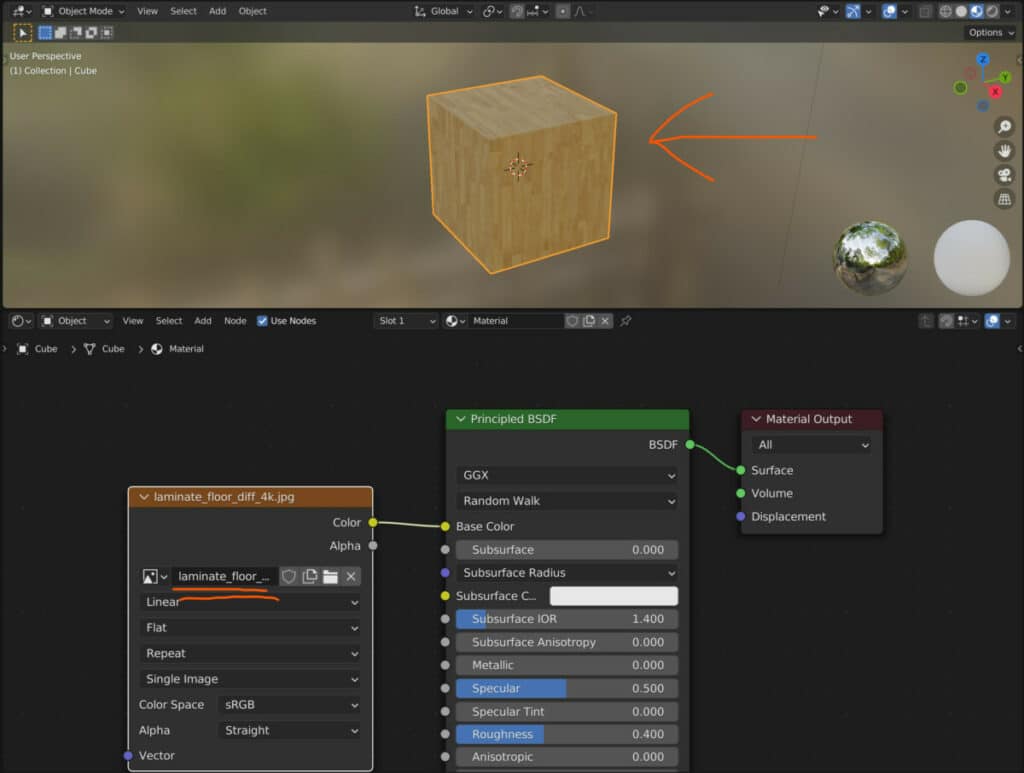
Note that for mapping an image texture, it also needs to be opened in the image editor for a UV map to be created over it.
The texture will only be visible in the material preview and rendered view in the 3D viewport.
How To Import An Image In The VSE?
The VSE is Blenders video sequence editor, where we can import and edit various movie files. One editing method is introducing overlays, which come in many forms, including text and images.
To import an image in the video sequence editor, open the add menu and select image sequence. This is primarily used to add a sequence of numbered frames but can also be used for a single image.
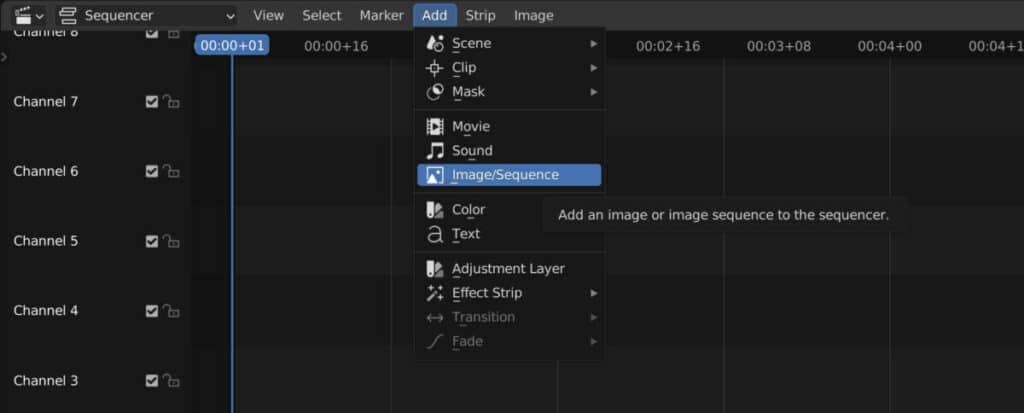
You can import an image this way and then position it in your timeline for when you want it to show, and you can choose if you want it to cover the whole screen or just a portion of it.
How To Import An Image For Compositing
The primary use case of the compositor is to act as an image editing application for rendered images of your 3D scenes, but that does not mean that it cannot be used for any image file.
To bring an image into the compositor for editing, tick the use nodes box to enable your node tree, then delete the render layers node and replace it by adding an image node.
Press the open button, locate your image and then select open image to bring it into the compositor, ready for editing.
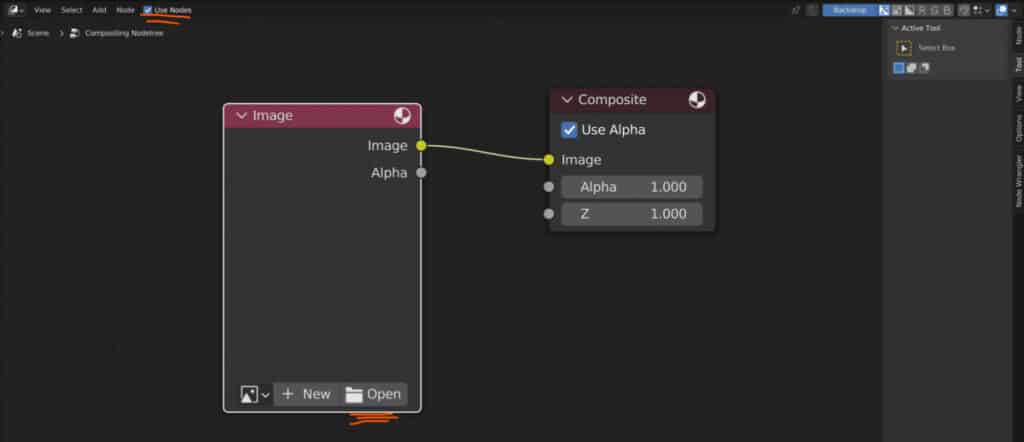
Note that it can be helpful to open up a couple of panels for the image editor to preview before and after shots of your image, with one using the original image and the other being fed through a viewer node.
Thanks For Reading The Article
We appreciate you taking the time to read through the article, and we hope you found the information you were looking for. If you are interested in learning more about using images in Blender, check out some of the articles we have listed below.
- Why Does My Rendered Image Look Pixelated
- Why Does Blender Crash When Rendering Images
- Adding An Image Sequence As A Plane Object
- Painting Transparency To An Image Texture
- The Process Of Applying An Image Texture To An Object
BEGIN LEARNING AND DEVELOPING WITH OUR BLENDER VIDEO SCHOOL!!
Check out our course library if you are looking for a systematic and effective way to improve your skills as a 3D artist. Click Here To Learn Blender The Right Way!
