Blender can be used for almost any 3D-related task, from concept design to 3D printing. One of its most popular use cases though is for creating 3D animation, as in addition to its modeling toolset, it also has a suite of tools used for animation as well. And these tools have their own keyboard shortcuts to make working with them easier.
Below is a list of the most important hotkeys that you will need to learn when creating 3D animations in Blender:
- Insert Keyframe (I – Any Property)
- Delete Keyframe (X – Timeline And Dope Sheet)
- Add Marker (M – Timeline And Dope Sheet)
- Render Animation (F12)
- View Rendered Animation (Control + F12)
- Play In Viewport (Spacebar – If Set In Preferences)
- Keyframe Handle (V – In Timeline, Dope Sheet, Graph Editor)
- Duplicate Keyframes (Shift + D – Timeline, Dope Sheet)
- Set Preview Range (P – Timeline)
This is just the tip of the iceberg, and as you can see, the workflow of creating 3D animations requires you to use more than just the 3D viewport. But how deep does the animated iceberg really go?
Where To Find A Full List Of All The Hotkeys Used In Blender For Animation?
Working with animations means that you will have to use multiple editor panels throughout your project. Starting with the 3D viewport, you will need to use the mode editor for materials, the dope sheet for creating and positioning keyframes, the graph editor for editing animation behavior, and the timeline for previewing your work.
Each of these has its own set of hotkeys applicable to its own toolsets. This makes it complicated to identify which hotkeys are required across an entire project.
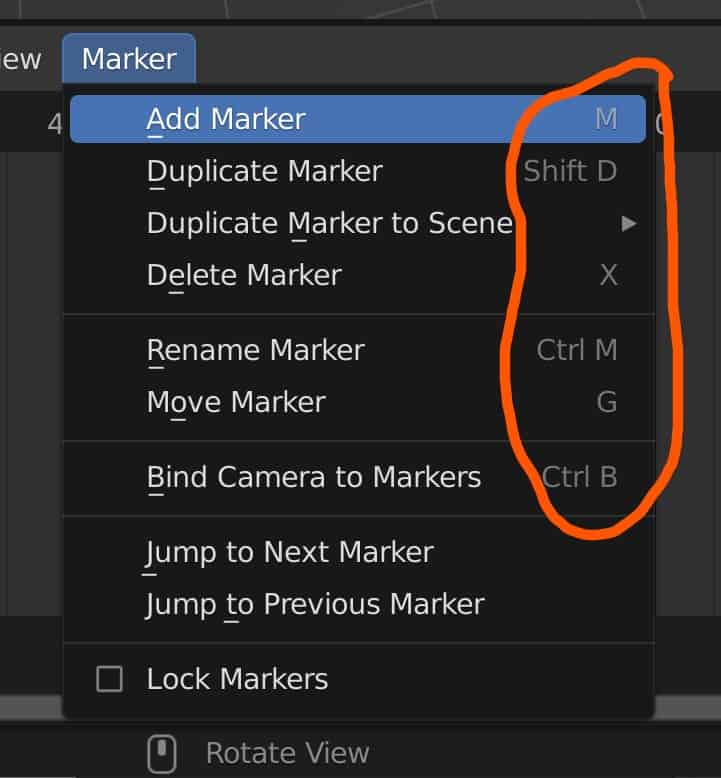
Fortunately, Blender makes it plausible to find all of these hotkeys using two methods. The first method is by labeling the assigned hotkey next to the tool in the menu. The hotkey will always be in greyed-out text. If the text is not there, then no hotkey is assigned to that tool.
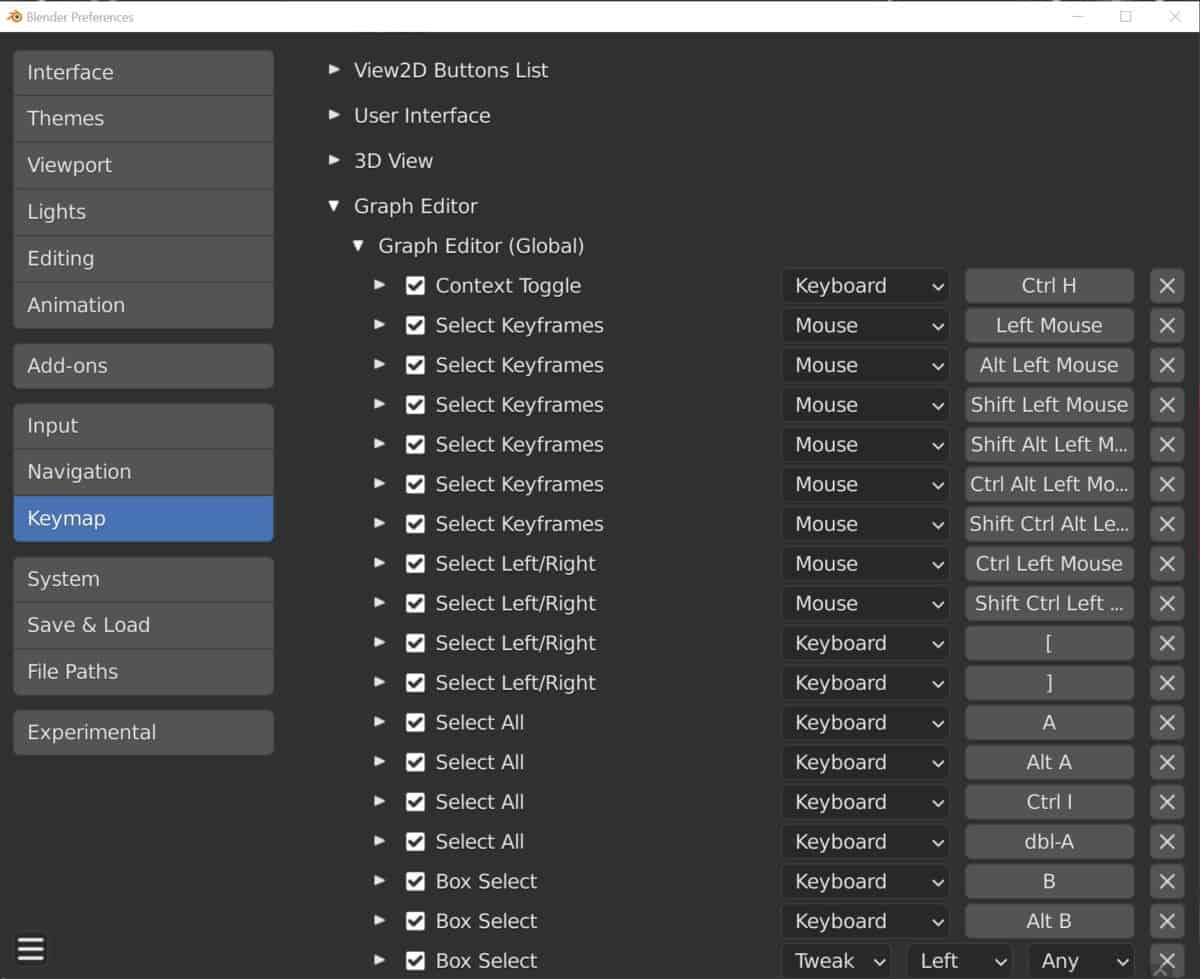
The second way you can view the assigned hotkeys is to use the keymap library in the preferences panel. To access the keymap library go to the edit menu at the top of the UI, and then select preferences at the bottom of the list.
This will open up the preferences panel in a separate window. The column of tabs to the side is for the various sections of the preferences panel. The one that we need to select is the Keymap section. Here we get a hierarchical list of all the different sections of Blender and inside them all of the hotkeys used in that area.
For animation we need to look at the keyframes for the areas listed below:
- 3D view (Global)
- Animation
- Dope Sheet
- Graph Editor
- NLA Editor
A Comprehensive List Of The Hotkeys That We Need To Learn For Animating 3D Scenes
As we mentioned before the list above is the tip of the iceberg when it comes to hotkeys connected to tools used for animation. We have a more comprehensive list below, but because we work in several editors for animation we have divided the list into these areas.
General
- Render Animation (Control + F12)
- View Renderered Animation (Control + F11)
- Keyframe Insert (I)
Timeline
- Select All (A)
- Move Keyframe (G)
- Duplicate Keyframe (Shift + D)
- Delete Keyframe (X)
- Add Marker (M)
- Rename Marker (Control + M)
- Bind Camera To Marker (Control + B)
- Set Preview Range (P)
- Clear Preview Range (Alt + P)
- Display In Seconds (Control + T)
- Handle Type (V)
- Keyframe Type (K)
- Keyframe Interpolation (T)
- Play (Spacebar If Assigned In Preferences)
- Play In Reverse (Shift + Control + Spacebar)
- Jump To Keyframe (Up/Down Arrow)
Dope Sheet
- Select All (A)
- Move Keyframe (G)
- Duplicate Keyframe (Shift + D)
- Delete Keyframe (X)
- Mirror Keys (Control + M)
- Snapping (Shift + S)
- Handle Type (V)
- Keyframe Type (K)
- Interpolation (T)
- Extrapolation (Shift + E)
- Easing (Control + E)
- Copy (Control + C)
- Paste (Control + V)
- Filter Channel (Control + F)
- Proportional Editing (Shift + O)
Graph Editor
- Smooth Keys (Alt + O)
- Bake Curve (Alt + C)
- Sample Keyframes (Shift + Alt + O)
- Delete Keyframe (Delete)
- Handle Type (V)
- Interpolation (T)
- Easing Type (Control + E)
- Frame All (Home)
- Move (G)
- Rotate (R)
- Scale (S)
- F-Curve Context Menu (RMB)
- F-Curve Modifier (Shift + Control + M)
How Versatile Is The Add Keyframe Hotkey?
In terms of both its array of options and its availability across Blender, the add keyframe hotkey is perhaps the most versatile hotkey of all, aside from the general hotkeys used for rendering, saving, and opening new projects. The add keyframe hotkey is the I hotkey and is pseudo-universal across Blender.
There are a couple of places where the I key is not used to add a keyframe, however, such as edit mode in the 3D viewport. Here when editing a mesh object the I key is instead used for creating an inset on the models’ geometry.
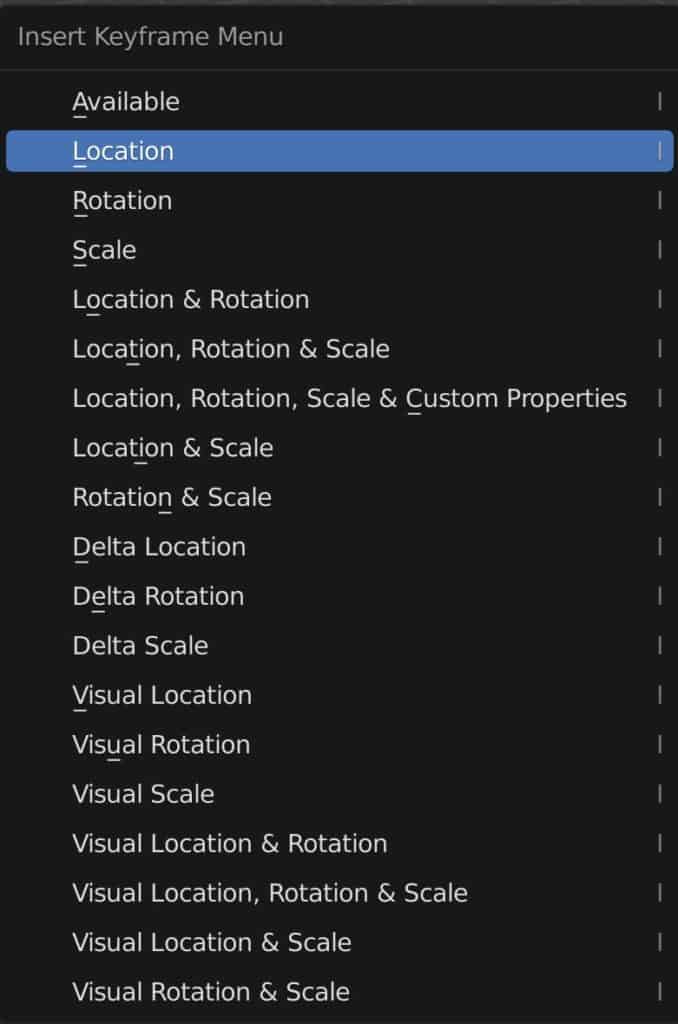
The easiest way to get started with using the add keyframe tool is to manipulate the transforms of an object, like its location, rotation, and scale.
Pressing I in the 3D viewport brings up a long list of options for how you want to add keyframes, but many of these options relate to transforms, just with different combinations.
You can for example set a keyframe only to the object’s location, or set the keyframe to the location, rotation, and scale all at the same time.
Outside of the viewport, the I key can be used to edit a specific property just by hovering over the property and pressing I.
For example, you can animate the base color of your material so that it changes over time, or you can animate numerical values that operate within a range like material roughness.
Not every property can be animated, but the ones that you may want to animate will be affected by the I key. Any property in Blender, that can be animated will have a small dot located next to it, which can be pressed to create a keyframe as well.
Why Using Quick Favorites Is A Great Workflow For 3D Animators?
In Blender, we need to work with several different editors for various stages of our projects, and this is most evident when our projects involve creating 3D animations. It can become confusing when moving from one panel to another to know which hotkeys relate to which tools, as sometimes one hotkey can represent a different tool for each editor in Blender.
With the quick favorites menu, we are better able to locate our more commonly used tools without even having to memorize the hotkeys themselves.
Quick favorites are activated by using the Q key which is universal in every panel of Blender. While it may take a second longer to get there, remembering one hotkey for all your preferred tools is easier than remembering one for each.
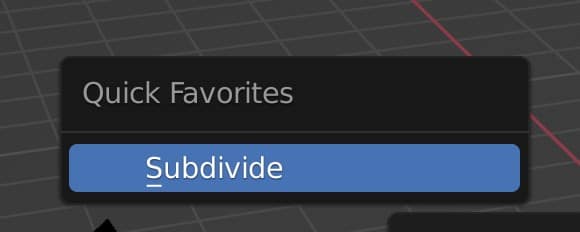
To add a tool to the quick favorites menu, locate the tool in its original menu, such as the add marker tool in the marker menu, and instead of pressing the left mouse button to enable, press the right mouse button to open the context menu.
The first option in the context menu for any tool will be to add that tool to the quick favorites menu, so select this option and then press the Q key to open the quick favorites menu, and you should now see that tool.
The quick favorites menu is sensitive to the panel it is used in, so the marker tool won’t appear in your quick favorites when you are in the 3D viewport, but this is an advantage. You can add 4-6 tools per panel, and always access an easy to read menu when you transition to the next stage of Your project,
Thanks For Reading The Article
We appreciate you taking the time to read through the article. Below we have gathered a list of additional subjects that we think may be of interest to you.
- What Are The Shortcuts For 3D Modeling?
- What Are The Shortcuts For Navigating The 3D Viewport?
- Improving Your Workflow With Blender Shortcuts
- Assigning A New Hotkey To A Tool
- What Is The Shortcut For Adding A New Mesh Object?
-
Blender’s Ambient Occlusion: Depth Tricks
Enhancing depth and realism with ambient occlusion in Blender.
BEGIN LEARNING AND DEVELOPING WITH OUR BLENDER VIDEO SCHOOL!!
Check out our course library if you are looking for a systematic and effective way to improve your skills as a 3D artist. Click Here To Learn Blender The Right Way!
