The core tool used for creating any animation in Blender is the keyframe. This assigned start/endpoint allows us to determine when and how assigned values are changed and to make such changes visible in the viewport as an animation.
The easiest way to add a keyframe to an element in Blender is to locate the changeable value of the element, such as the Z rotation of the object, and press the I key to insert a keyframe at that current point. Then change to a different frame to act as the endpoint, change the value in question and press I a second time to create the end point of the animation.
Most of the elements that influence the scene within the 3D viewport can be altered and animated using the keyframe system. This includes transforms and other more obscure elements such as the light strength, camera depth of field, and even the base color of a material.
How Do Keyframes Work In Blender?
If you plan to use Blender for animation, whether 2D or 3D, you will need to understand what keyframes are and how they work.
A keyframe is where we assign a specific value to an element or property to a target frame. For example, in frame 1, we can assign the X location of a cube the value of 0.
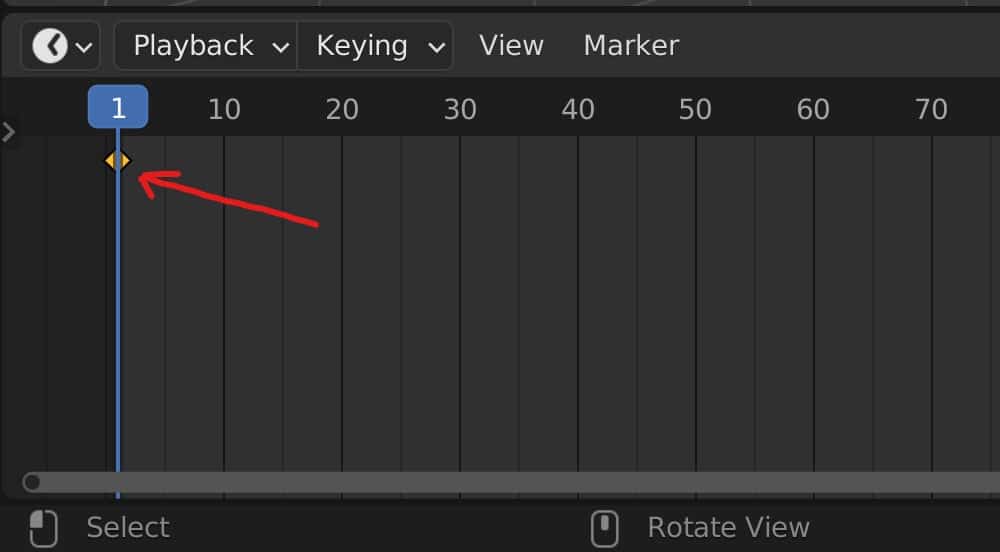
These keyframes are visible in the timeline panel, but to view them, we will need to drag the timeline up so that we can see more than just the header bar.
A single keyframe does not do anything by itself, as the idea is to combine two keyframes. The first keyframe is the start point of the animation.
We then select a frame later in the animation, such as frame 120, and then change the value of the X location for the object to a value of 5.
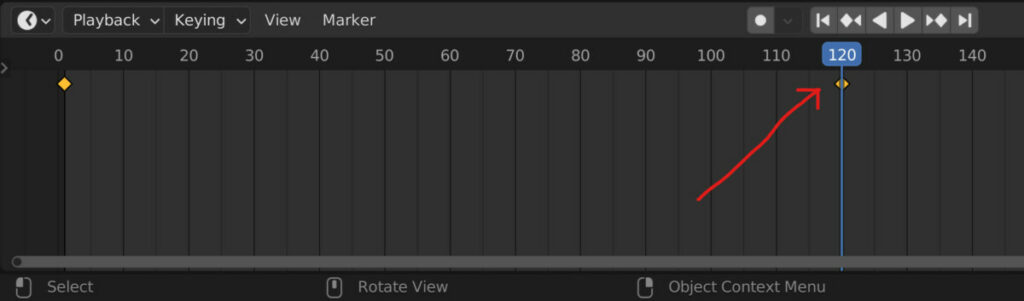
Once the value has been altered, we can add a second keyframe at this point, which is the end point of the animation.
If you play your animation from the start point to the endpoint, then the object starts on the X axis at a position of 0, and begins to move along that axis until it reaches the value of 5 on the X axis on frame 120, where it then stops moving.
This is fundamentally how all keyframe systems work. Each element, property, or parameter can be edited at different frames, and the difference between the values can be used to form an animation with the help of adding keyframes.
Can You Have More Than Two Keyframes For A Single Element?
All animations must require at least a frame to indicate an initial value and a frame to indicate the final value. However, we can have as many keyframes as possible to improve the animation and make it more complex.
For our X location, we could add a keyframe at frame 60 and set the value on that frame to 4. This creates an animation where the first looks much faster than the second.
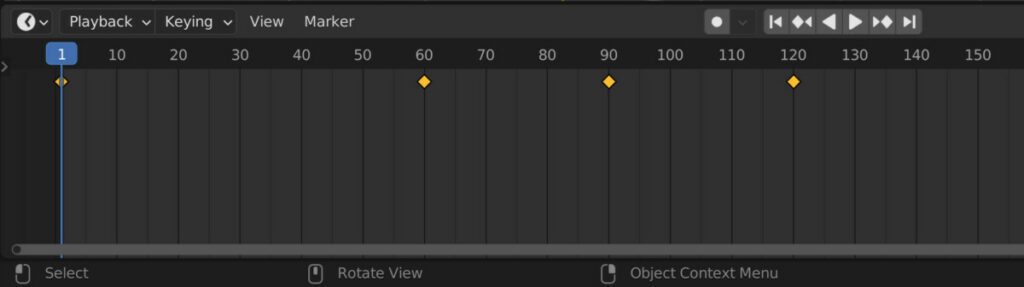
Additionally, we can even reverse the direction of our object by selecting frame 90, assigning a value of 3 on the X-axis, and then adding a fourth keyframe to create an animation where the object moves in multiple directions on its way to its destination.
The Different Ways That We Can Create Keyframes In Blender
In Blender, we can go far beyond simply animating the transforms of our objects, and there are many different ways that we can animate the various elements within the Blender UI.
Below are the various ways in which we can add keyframes to our changeable elements in the Blender UI and viewport.
Accessing The Keyframe Menu
The first method within the 3D viewport is to add keyframes using the keyframe. This menu can be accessed by pressing the I key, which should offer various options for adding a keyframe.
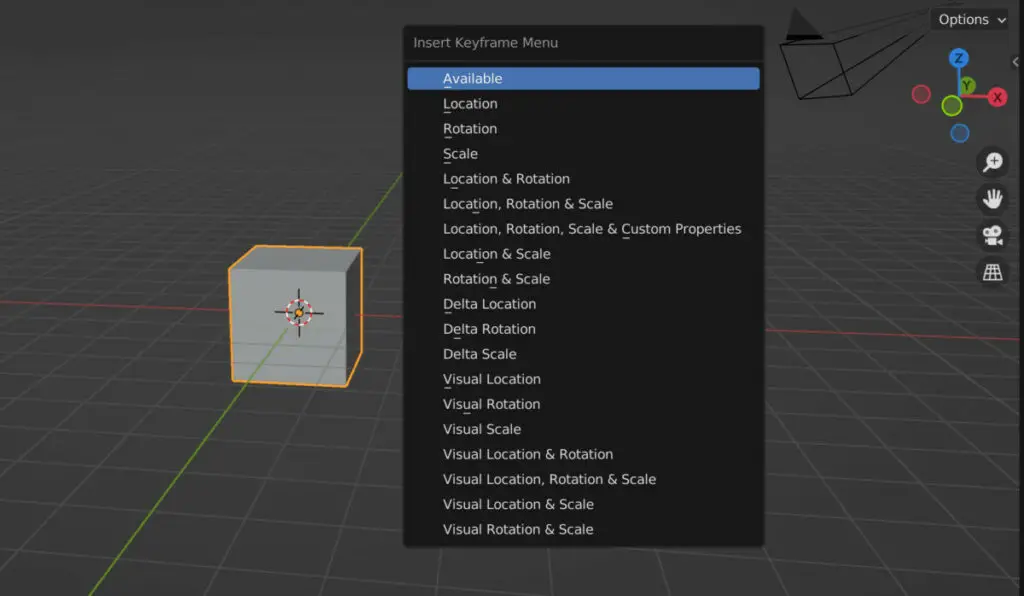
As you can see from the menu, it primarily revolves around the transform values of the selected object. We can add keyframes to individual transforms or keyframes to multiple transforms if we want to animate all of them or any two.
Then we can animate our transforms in certain states, like in the visual form or delta form, again having control over the combination of transforms we can animate.
This menu is only accessible in object mode. In edit mode, the I key is instead used to create insets on our objects.
Creating Keyframes Of Transforms In The Side Panel
A more visual way of creating keyframes for our transforms is to use the side panel, which can be accessed by pressing the N key on our keyboard.
The transforms are all made available here, and you can edit the value of each of the three transforms on each axis.
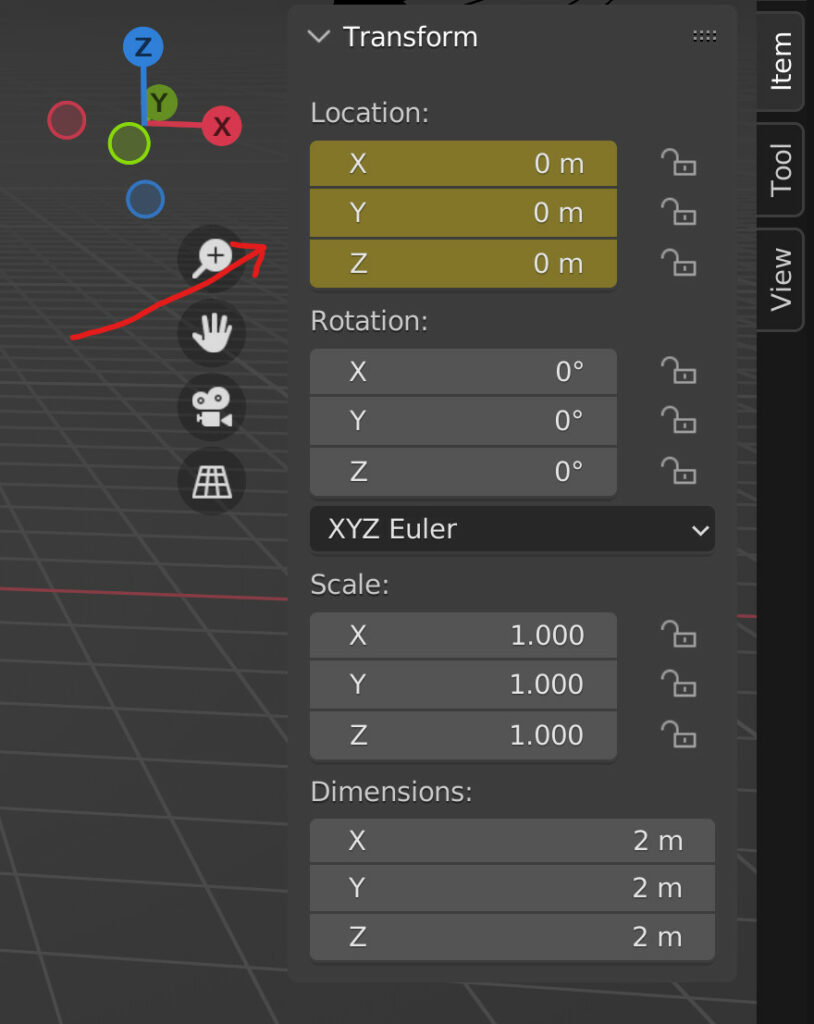
To insert a keyframe here, hover your mouse cursor over the transforms that you want to keyframe, and press the I key.
Instead of bringing up the keyframe menu, Blender is smart enough to add a keyframe to the transform directly.
There are a couple of things to note while using this method. First, like the keyframe menu, our keyframes are added to the transform as a while, which means keyframes are added to each of the three axes.
Second, when a keyframe is added to the transform, the values are highlighted yellow to indicate there is a keyframe for that value on the current frame.
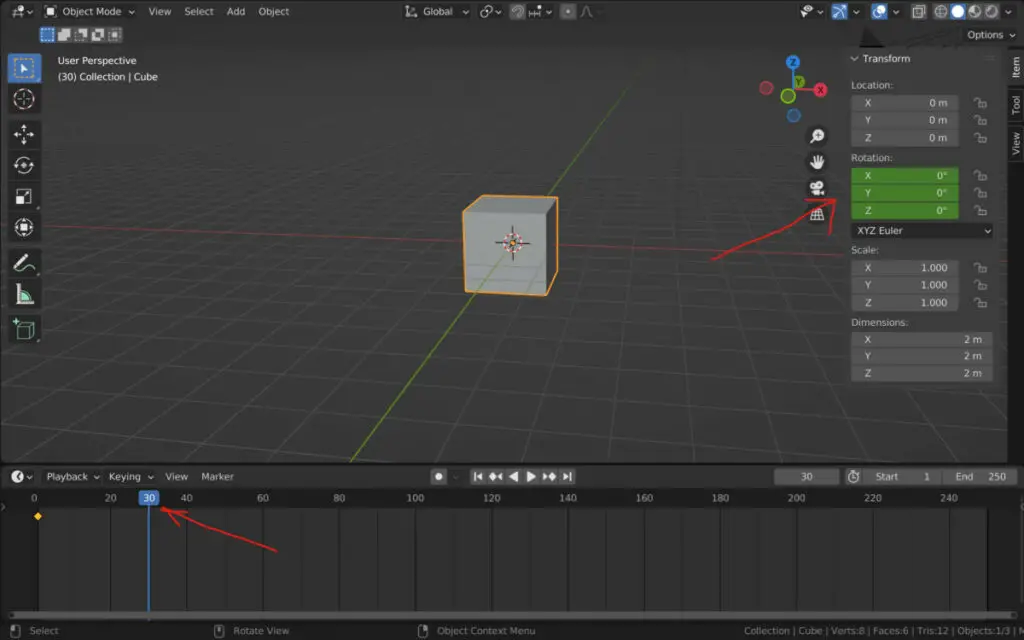
Move to another frame on your timeline, and the color of these transforms changes to green. If we change one of the transform values, such as the Z rotation, the color changes to orange.
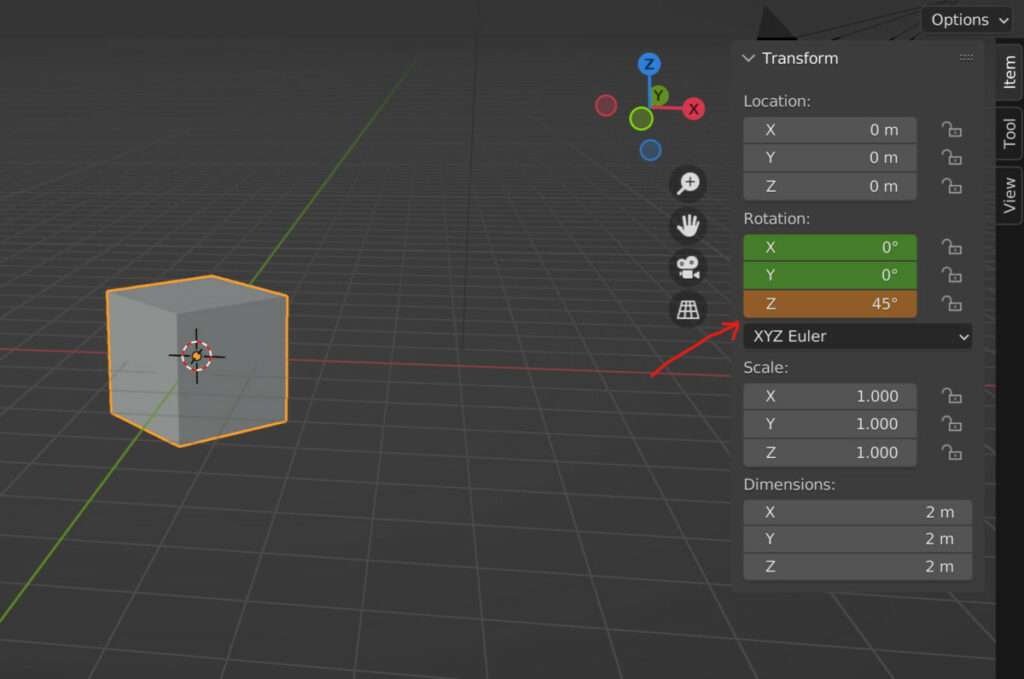
This indicates the value has been altered, but a keyframe is yet to be assigned. Note that if you change the frame after this value has been changed, but do not insert a keyframe, then the change is removed and reverted to the value of the original keyframe.
Using The I Key In Other Areas Of Blender
The side panel is not the only place we can use the I key to insert a keyframe on our value. There are many other parameters and locations where we can use the I key to insert keyframes.
Materials use node systems that are built from a range of different values. The majority of these values can not only be edited but also animated.
You could add a simple material with a principled BSDF shader and have it with a very low amount of roughness.
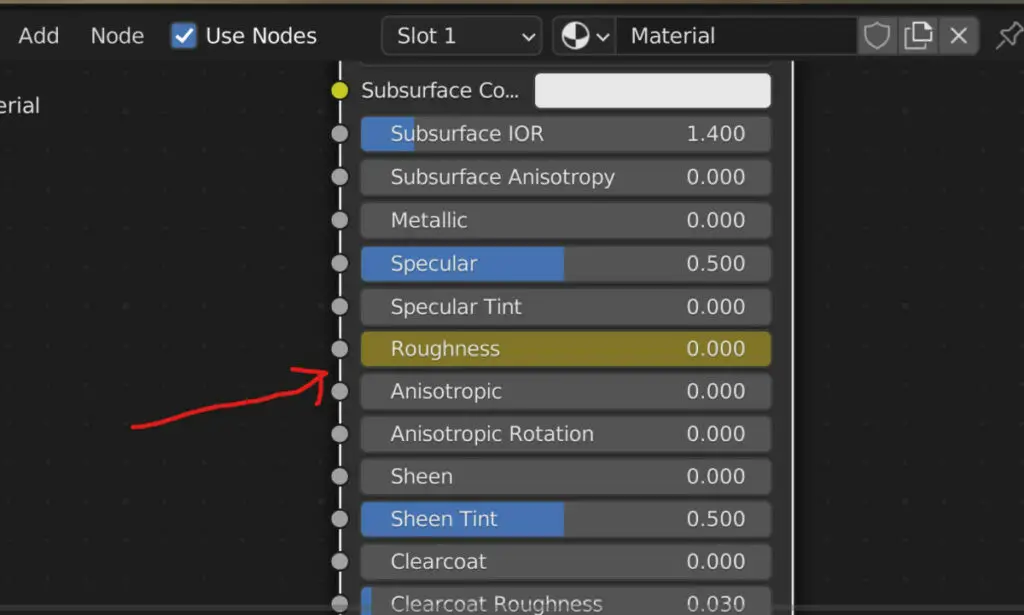
Press the I key over the roughness value to insert a keyframe. You can then increase the amount of roughness applied to your material over time by selecting another frame, increasing the roughness value, and then pressing the I key again.
Not all editable values in blender can be animated. The dimensions of your object are one such set of values to which we cannot add keyframes.
However, any properties or parameters we want to animate can be animated. This includes many of the nodes within the node editor for materials, as well as multiple values that we can locate in the properties panel.
Enabling Automated Keyframes In The Timeline
The timeline has a unique feature that allows you to keyframe changed values when you change your active frame, all without needing to press the I key or access the keyframe menu.
This feature is known as the recording tool, and it appears as a singular white button near the playback controls of the timeline.
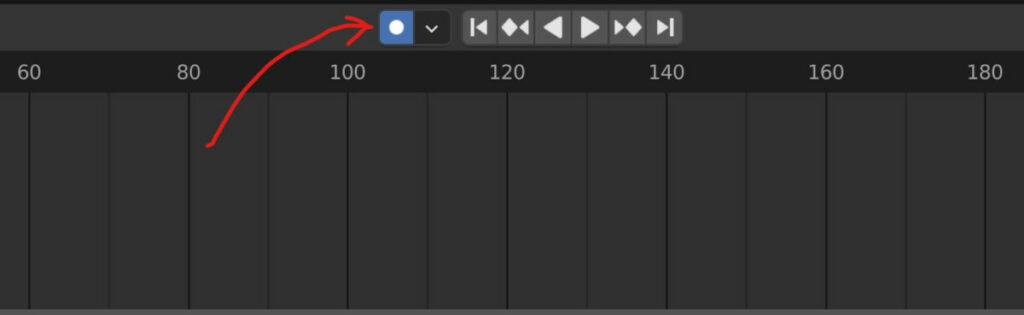
Left Click to activate the tool. To work correctly, creating a keyframe for the property you wish to animate before activating the tool is best.
With many elements we change in Blender, the recording tool has to locate where the change is made and then insert a keyframe on that element. Therefore, we must start by manually creating a keyframe for the element we wish to change. And then, we would use the recording tool to add further keyframes to that element.
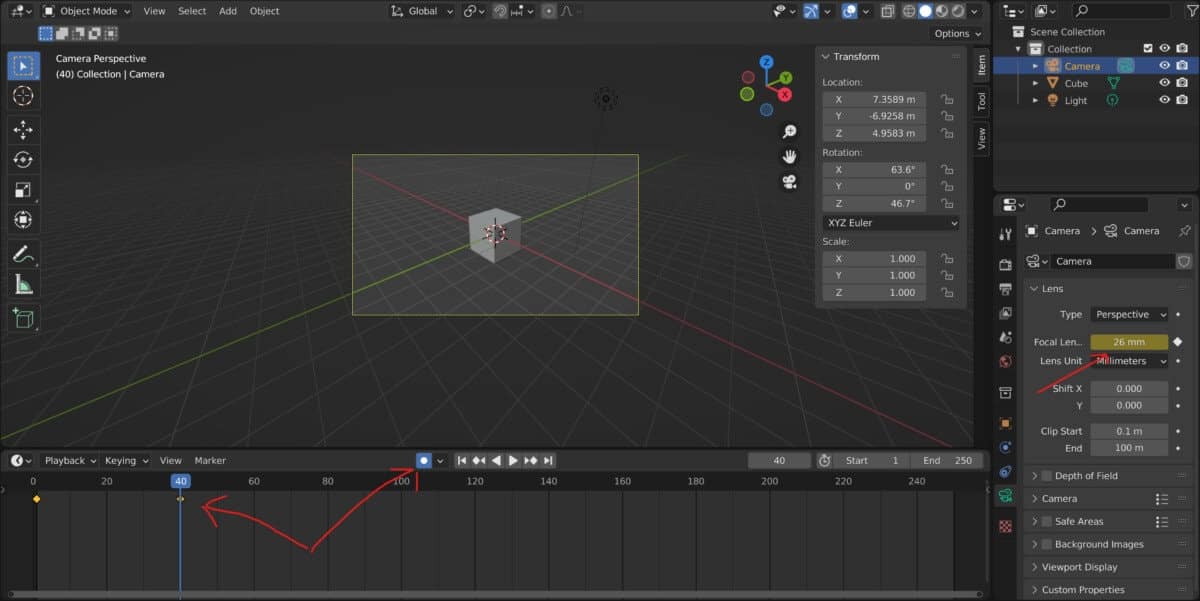
For example, we could animate the lens zoom of our active camera. We locate the lens parameter in the object data tab of the properties panel with the camera selected.

We can then hover over the lens value, which should currently be set to 50MM, and press the I key to insert a keyframe similar to how we would in the side panel of the viewport.
With the start frame active for the camera lens, the next step would be to activate the recording tool and change the frame where we want to add the next keyframe.
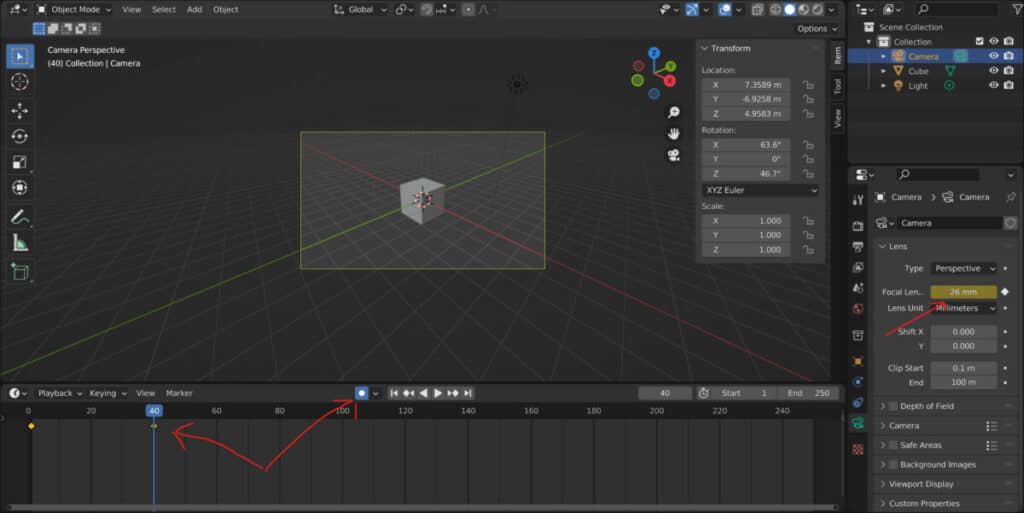
Now we can change the value of the camera lens, and as soon as we confirm that change, a keyframe will automatically be added.
This becomes more useful than more keyframes you want to add to an animation. In our example, we manipulate the camera lens value to initiate a zoom effect for our animation.
The Diamond Marker In The Properties Panel
One of the areas of Blender with the most extensive array of tools is the properties panel. This is the area in Blender that houses the tools that could not be stored in any of the other editor types.
We can access various tabs to use different feature sets, ranging from our output properties to our modifiers.
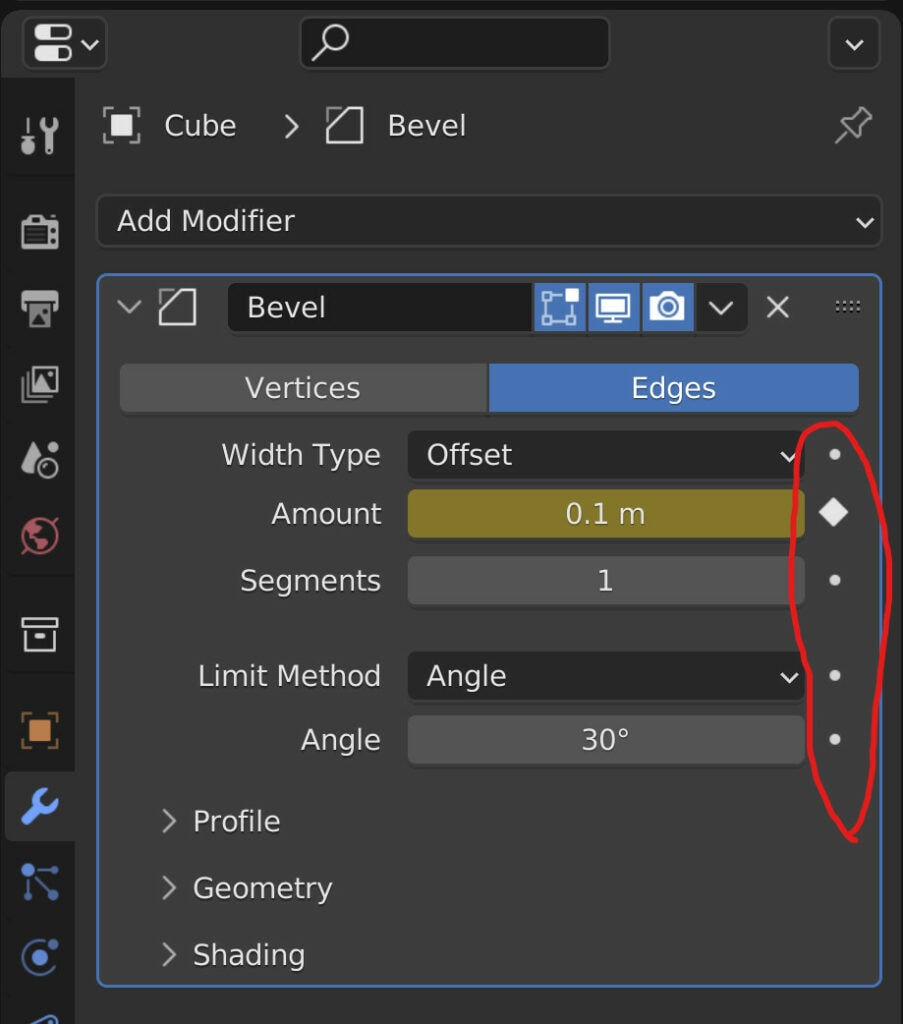
Many of the values in the properties panel will have a small diamond dot next. This is another way in which we can animate these values.
If you see a diamond dot, that specific value can be animated, and if we left-click on it, it will add a keyframe to that specific value.
We can left-click on the same marker to remove that keyframe from that value. This is a bonus feature not present with any of our other methods.
For any other method of creating keyframes, we would need to go to the timeline order dope sheet, select the keyframes we wish to remove, press the X key, and then choose to delete the keyframes.
What Elements Can We Keyframe And Animate In Blender?
By now, you should know which elements can be keyframed and animated in Blender. The critical criteria or whether or not we can animate a value is if it can be changed. The majority of values you will find within the Blender UI can be animated, but not all of them.
The second criterion for which elements we can animate is whether or not they would even impact a 3D Scene when rendering.
For example, we have access to the view tab within the side panel. Here we can change things like the lens of the viewport and the start and end clipping points. We can’t animate any of these values, unlike the transforms found in the side panel.
The reason is that there is no point in having this feature for such values that were late for 3D viewports and have no effect on the 3D scene.
If we were to go to the object data tab of the camera object in the properties panel, we would see these same values. Still, they would be associated with the camera object, affecting how our animation appears. This is why we could add keyframes to these values, not ones within the side panel.
Removing Keyframes From Your Animation
Finally, we need to know how to remove any keyframes we no longer wish to use. This is a simple process when you add keyframes in the properties panel, as you have access to the animated diamond dot next to the values to which you add keyframes.
Just left-clicking on this diamond dot will remove that keyframe, so long as you are already on the same frame that the keyframe is on. Be mindful that clicking on the diamond dot will add a keyframe to the current frame if you are on a different frame.
You would need to go to the timeline for all other keyframes that she would add in Blender. Locate the keyframe that you wish to delete. Make sure to open up the summary channel, which can be accessed using the T key. This will allow you to select specific channels.
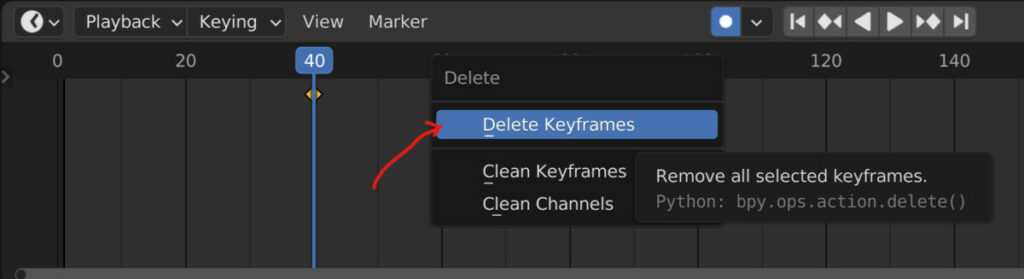
Prestige on your keyboard to bring up the delete menu while your mouse is within the timeline. Choose the delete keyframes option to delete any of the ones you have currently selected.
Alternatively, you can use the right mouse button to bring up the timelines context menu and locate the delete keyframes option from the context menu.
Thanks For Reading
We appreciate you taking the time to read through the article. We hope you found the information you were looking for. If you are interested in learning more about the Blender software, you can check out a few of the articles we have listed below.
- Using The Timeline To Create Basic Animations
- Using The Dope Sheet To Create Basic Animations
- Can Blender Do 2D Animation
- Is Animation Hard To Learn
- Getting Started With 2D Animation In Blender
BEGIN LEARNING AND DEVELOPING WITH OUR BLENDER VIDEO SCHOOL!!
Check out our course library if you are looking for a systematic and effective way to improve your skills as a 3D artist. Click Here To Learn Blender The Right Way!
