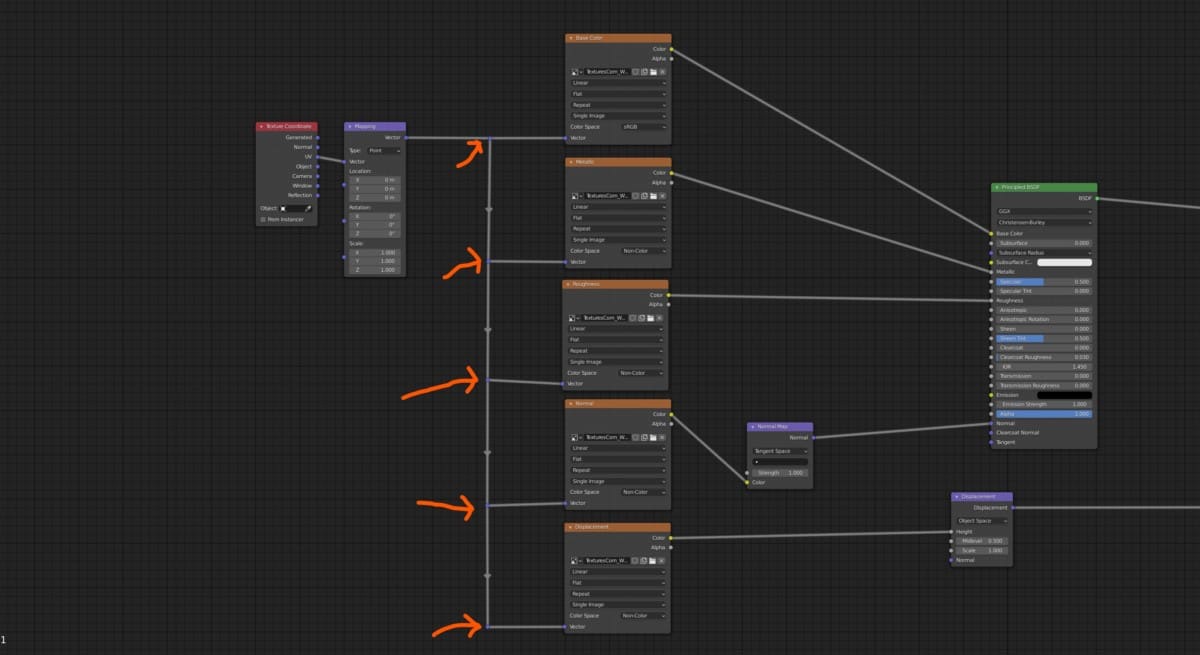
If you have reached the point where you are able to create more advanced materials, then you will have also reached the point where your node trees are becoming more difficult to read even for the artist that creates them. There are different ways to improve the visual appearance of your node tree though.
Reroutes are a great way of redirecting noodles to improve the organization of the node tree. To add a reroute press Shift + A > Layout > Reroute and connect your reroute to an existing noodle or position it in an empty space. Then connect it to your nodes for added control.
There are a few reasons why you should learn how to use reroute nodes and adopt them as a part of your setup. So what are the benefits of using a reroute node?
The Benefits Of Using The Reroute Node For A Material
Even professional artists often fail to successfully organize their node trees. The organization does not make a material better or worse, but it does improve the general workflow and readability of the node tree. There are a couple of scenarios where organization, in general, is important.
If you are working on a material as part of your own individual project, then you may think that you can skip the step of cleaning up the node editor. However, consider a situation where you have created a material, then you want to make some changes to that material later on.
Do you think you would be able to remember what each node does, and what it is responsible for? Making changes to your materials without understanding how they were built in the first place can result in you breaking your material with little idea as to how to fix it because all you see is a jumbled set of grey boxes with dozens of connections between them.
Another situation where organization is crucial is in a full working environment where you are a part of a team. In this situation, other team members may need to use, view, or edit the materials that you create. Now if you don’t fully understand how the material you create works, then how could you expect others to.
There are several tools that we can use to better organize our material setups, such as frames, labels, and node groups. But these all relate to the nodes, rather than the noodles that connect them. The noodles need to be arranged in a way that makes it clear what the structure of the node tree is, and reroute nodes are the perfect tool to achieve this.
With a reroute node, you can adjust the direction of your noodles to go around your nodes rather than through them. You can also send multiple noodles from a single reroute and attach them to multiple nodes. And you can even use multiple reroute nodes on the same noodle to further improve the clarity of your node setup.
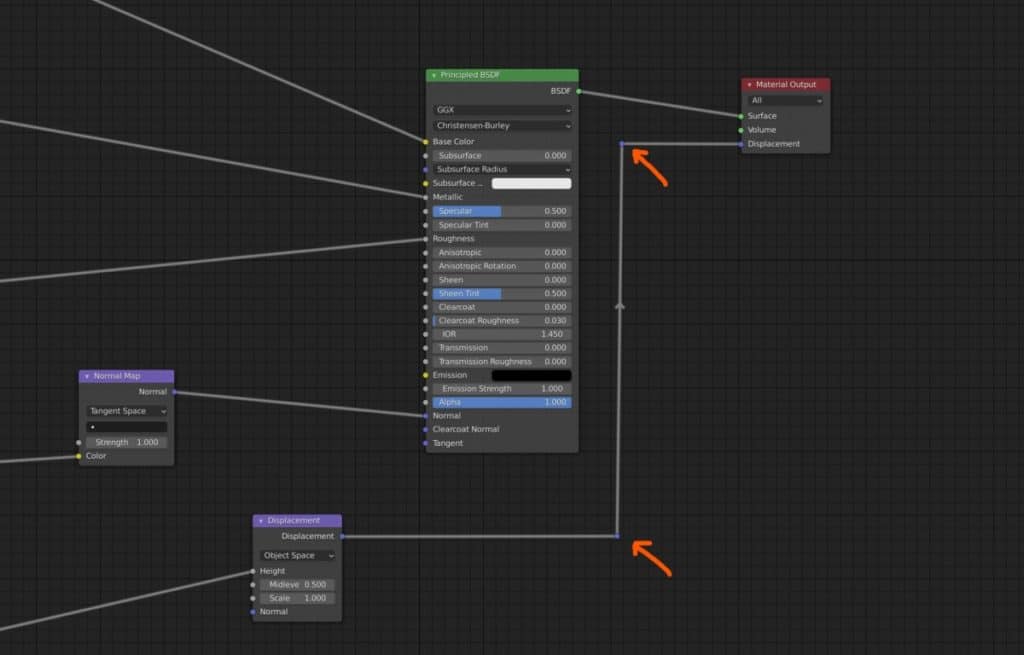
Below are two images, the first is a texture set up with very little organization of any kind. The second image is the same setup but with multiple reroute nodes added to redirect the noodles and improve the clarity of the node tree.
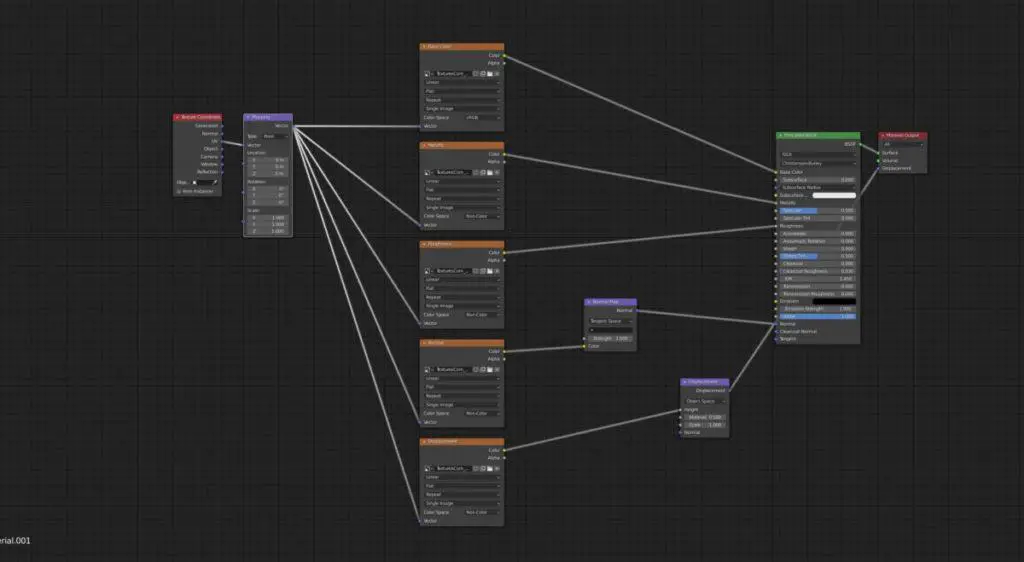
As you can see there is a very notable difference between the two images. Even though it is the same material, the second image paints a clearer picture of how the nodes are connected to each other.
How To Create A Reroute
Creating a reroute node is as easy as creating a regular node. Go to Add (Menu) > Layout > Reroute and position your reroute anywhere in your node setup. You can either place it on its own to start with or connect it to an existing noodle. When you go to connect it the noodle will highlight to indicate when it can be joined to the reroute.
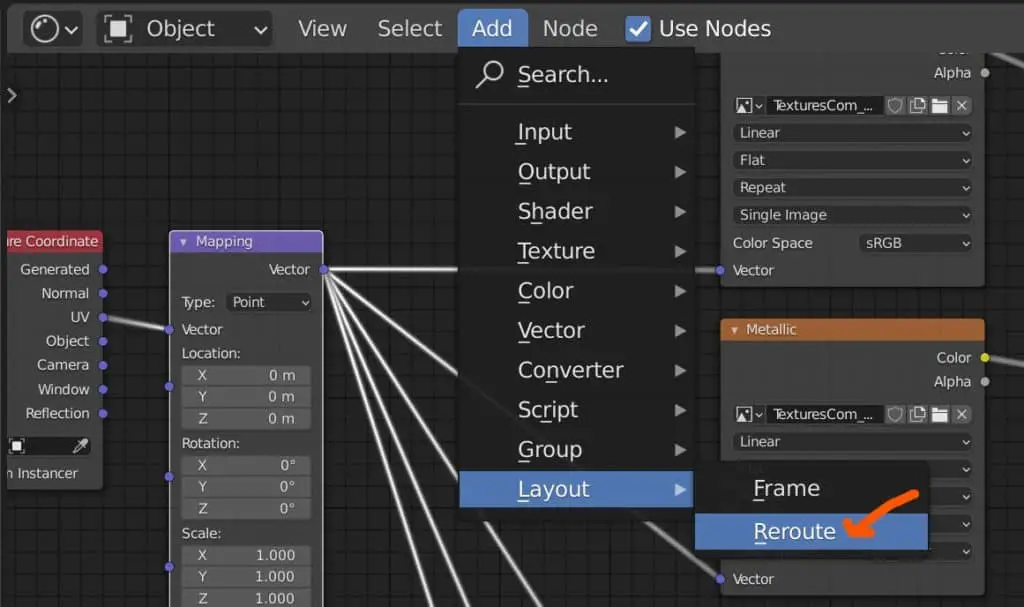
Adding the reroute node in this way does not disconnect the noodle from the other nodes, but now you can move the reroute to help better direct the noodle itself.
Like many tools in Blender, there is a faster way of getting to the reroute node. By pressing Shift + A on your keyboard you can access the same add menu slightly faster than before.
Unfortunately, there is no hotkey for the reroute node itself, although you can always assign you or and the reroute to your quick favorites with the Q key.
Using Multiple Reroutes In A Chain
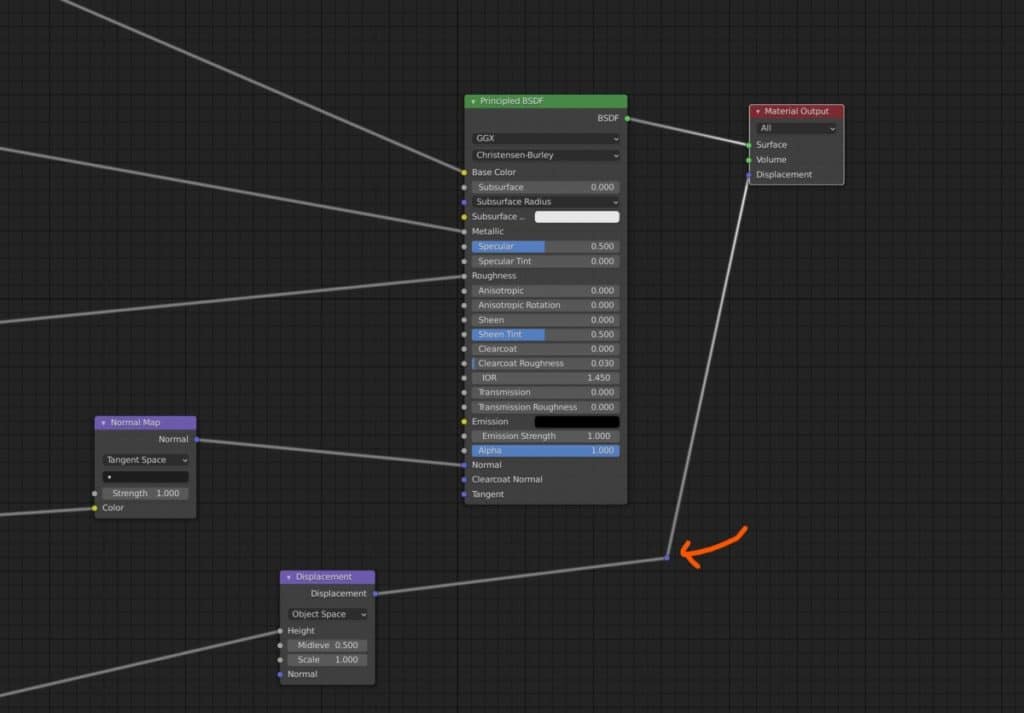
One of my favorite use cases for reroutes is for creating right-angle bends for an almost machine-like look to my node setups. This requires the use of at least two reroutes per noodle. For example, say you have a displacement node and it is attached to the material output, if you also have a principled shader then the noodle that links the displacement to the material output may be behind the principled shader, like in the image below.
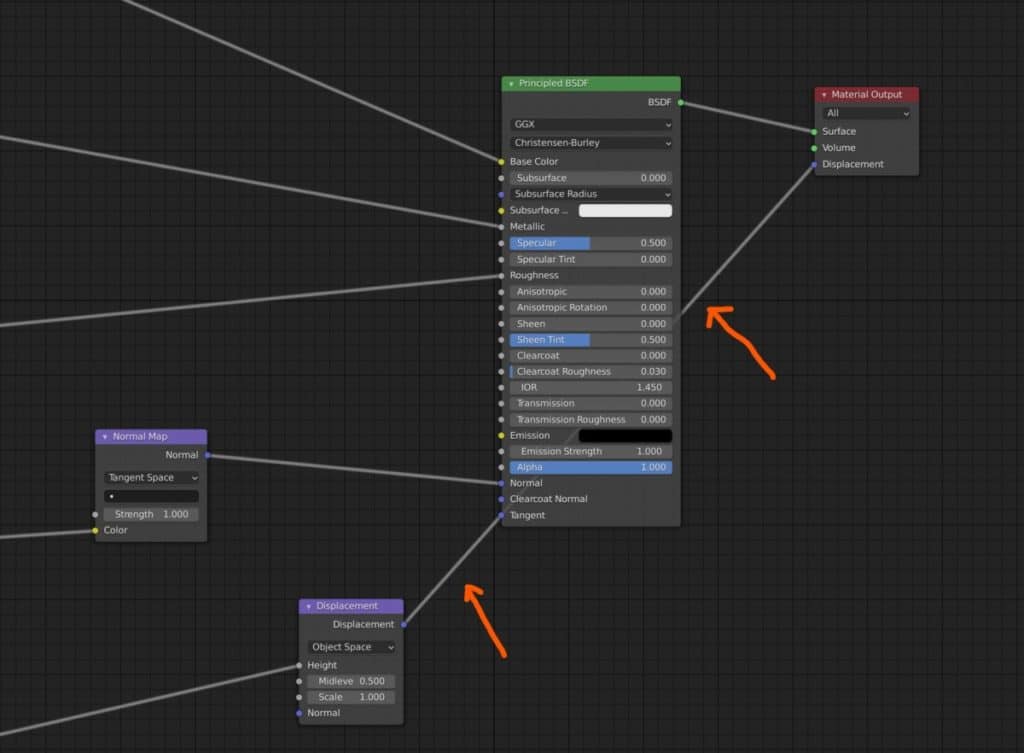
To fix this you could have one reroute node near inline with the displacement shader, and another inline with the material output, then create two right angles using those reroutes.
The result makes it much easier to see the connection between the two nodes as the principled shader is no longer in the way.
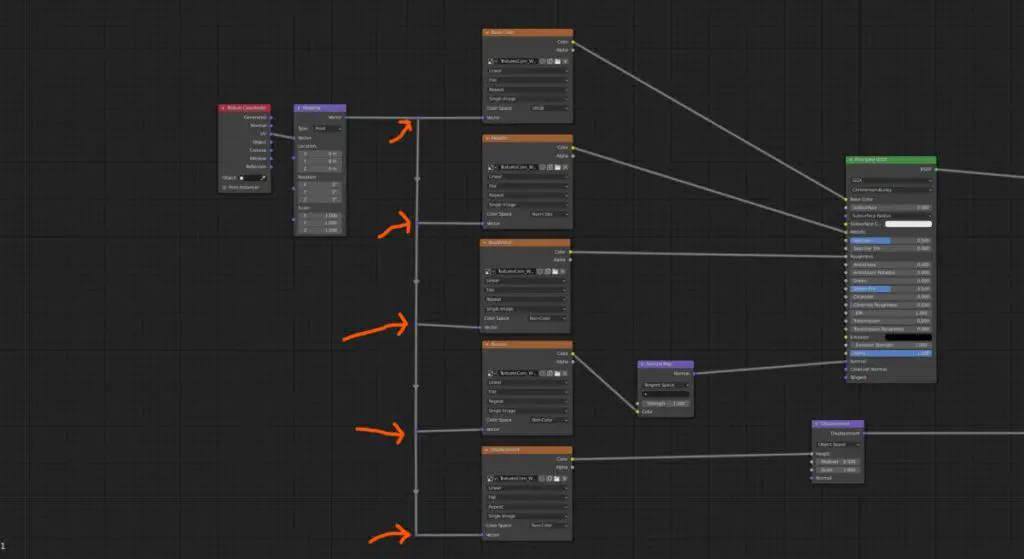
Another use case for multiple reroutes is when you are sending data to multiple nodes. Each node requires its own connection and this can look messy even with a single reroute.
By adding more reroutes you can further improve the viewability of your node trees. An example of this is in the image below where we use reroutes from a single mapping node to multiple textures.
Easy Rerouting Using The Node Wrangler Add On
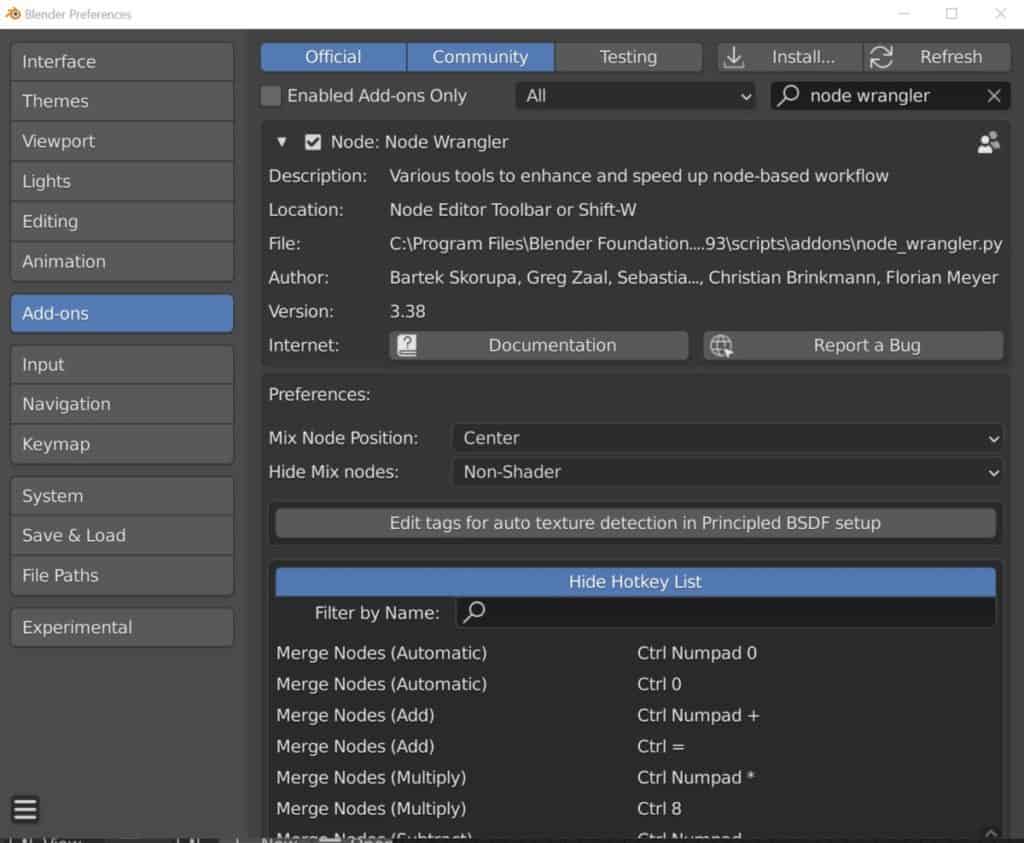
While Blender itself does not assign a hotkey directly to your reroute tool, there is a hotkey for reroutes when using the node wrangler add-on.
This should be on by default for most of you but if it is not go to Edit > Preferences > Add On and type node wrangler in the search bar in the corner. Then make sure the tickbox for the node wrangler is enabled and close the preferences panel.
The hotkey for adding the rerouting node here is / or Numpad /, but doing so will bring up a new menu. Instead of adding a new reroute anywhere in your node tree, you get a menu that asks you to attach reroutes to the outputs of a selected node.
You can choose to create reroutes for linked outputs where noodles already exist. Or you can choose to add reroutes to any loose outputs and prep them for use. Normally you will use the former option more than the latter.
Thanks For Reading The Article
Thank you for taking the time to read the article. Below we have compiled a small list of additional topics that we think you may be interested in reading…
- Improve Your Material Workflow With Node Groups
- Improve Your Node Setups By Introducing Labels
- Making Node Trees Easier With Frames
- 8 Ways To Use The Node Wrangler To Make Materials Easier
- How To Better Organize My Node Setups?
-
Node-Based Compositing in Blender
Exploring the power of node-based compositing in Blender.
-
Compositing Masks in Blender Explained
Demystifying compositing masks for creative control in Blender.
-
Blender Post-Processing: Effects Guide
Advanced post-processing effects for artistic expression in Blender.
BEGIN LEARNING AND DEVELOPING WITH OUR BLENDER VIDEO SCHOOL!!
Check out our course library if you are looking for a systematic and effective way to improve your skills as a 3D artist. Click Here To Learn Blender The Right Way!
