When you begin modeling in blender you will learn about the different modes used to divide up the various tools used in the 3D viewport, based on the object that you are using. For mesh objects, edit mode is the option for creating your 3D models by defining their shape and form using tools like extrude and bevel.
Below is a list of the key hotkeys that you will want to learn to improve your ability to design 3D objects in edit mode:
- Grab (G)
- Vertex Slide (G, G)
- Rotate (R)
- Scale (S)
- Extrude (E)
- Inset (I)
- Loop Cut (Control + R)
- Bevel (Control + B)
- Delete Geometry (X)
Learning to use hotkeys will improve the speed and productivity of your workflow. The more hotkeys you learn the faster you will be able to model. But are these the only shortcuts that you need to learn?
Are Blender Shortcuts Exclusive To Edit Mode?
The use of Blender shortcuts is not exclusive to editing mesh objects in the viewport, as you will find hotkeys wherever there are tools in Blender. Some hotkeys perform functions that are designed for use only in a specific area of Blender, which can be referred to as a specialized key.
An example of this is the E key which is used for extruding in the 3D viewport but has a different function or even no function at all in other modes and panels.
On the other hand, you have some hotkeys that can perform the same function across multiple panel types in Blender. For example, the G key is used to grab geometry in the 3D viewport, and this transitions to grabbing full objects in object mode, or even nodes in the node editor.
A Comprehensive List Of Blender Shortcuts In Edit Mode
If you are looking to learn as many hotkeys in Blender as you can then, you will obviously want more than the shortlist above, which highlights the key hotkeys that you should learn when creating scenes in object mode.
Below is a more comprehensive list of all the hotkeys that you will need to learn in edit mode…
- Select geometry (Left Mouse Button [LMB])
- Multiple selection (Shift + LMB)
- Path Selection (Control + LMB)
- Loop Selection (Alt + LMB)
- Select All (A)
- Deselect All (Alt + A)
- Selection Mode (1, 2, 3)
- Invert Selection (Control + I)
- Box Select (B)
- Circle Select (C)
- Geometry Context Menu (Right Mouse Button [RMB])
- Grab (G)
- Vertex Slide (G > G)
- Rotate (R)
- Trackball Rotate (R > R)
- Scale (S)
- Lock Transform To Axis (G, R, S > X, Y, Z)
- Lock Transform To Plane (G, S > Shift + X, Y, Z)
- Proportional Editing (O)
- Extrude (E)
- Bevel (Control + B)
- Inset (I)
- Loop Cut (Control + R)
- Knife Tool (K)
- Scale Along Normals (Alt + S)
- Shear (Shift + Control + Alt + S)
- Add Menu (Shift + A)
- Vertex Menu (Control + V)
- Edge Menu (Control + E)
- Face Menu (Control + F)
- Delete Geometry (X)
- Extrude Menu (Alt + E)
- Duplicate (Shift + D)
- Merge (M)
- Split (Alt + M)
- Separate (P)
- Recalculate Normals (Shift + N)
- Normals Menu (Alt + N)
- UV Menu (U)
- Face Fill (Alt + F)
- Create Edge (F)
- Rip Vertex (V)
- Rip And Fill (Alt + V)
- Rip And Extend (Alt + D)
- Connect Vertex Paths (J)
- Convert To Triangles (Control + T)
- Convert Triangles To Quads (Alt + J)
Locating The Shortcuts In Blender
If you want to locate your hotkeys in Blender itself and get the full list then there are a couple of ways to do so. The first method is if you are looking for the hotkey connected to a specific tool.

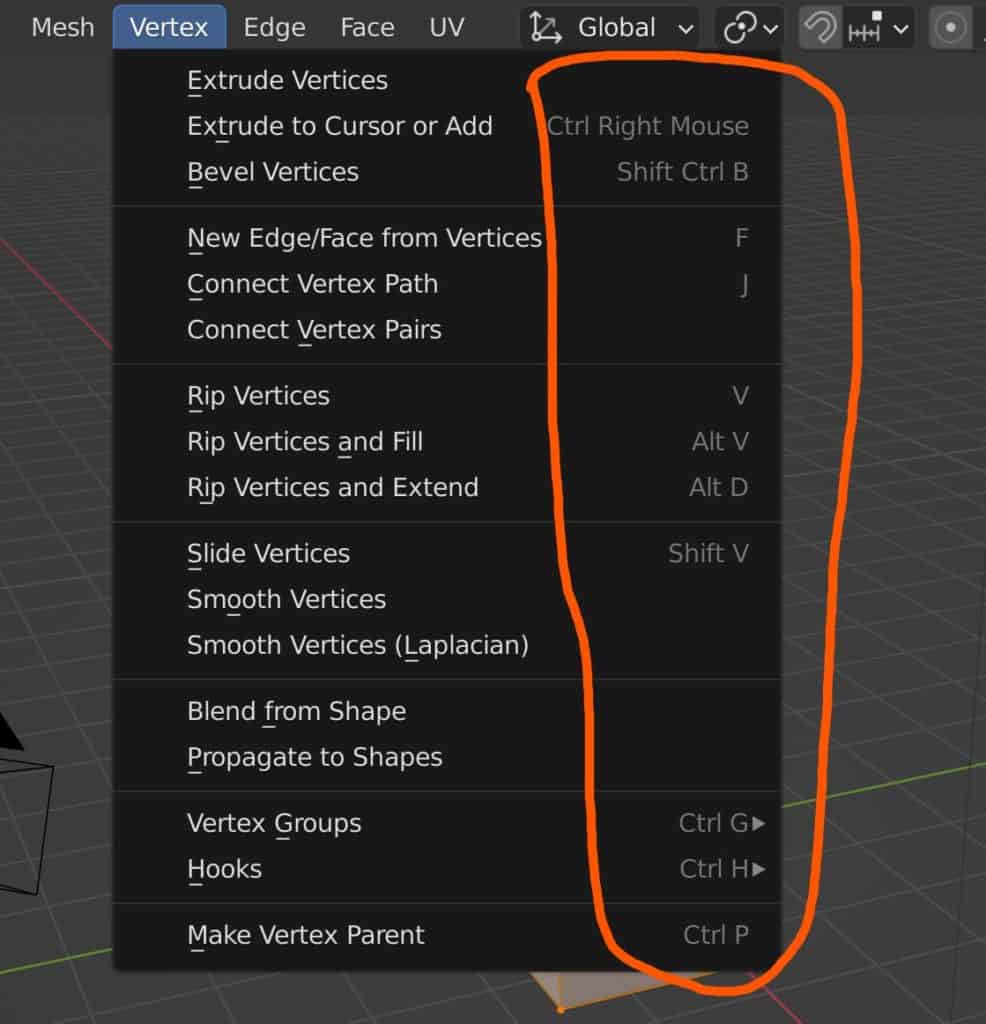
If you locate a tool in its menu you will see the name of the tool in white text, and to the side, you will see the hotkey that has been assigned to the tool in grey text. If you do not see any grey text next to the tool name, then no hotkey has been assigned to the tool.
The second method is for if you are looking to view the full library of Blender shortcuts. Hotkeys are so important to the Blender artist workflow that you have access to the entire library with the added ability to reassign hotkeys and even create hotkeys for tools that were not assigned any.
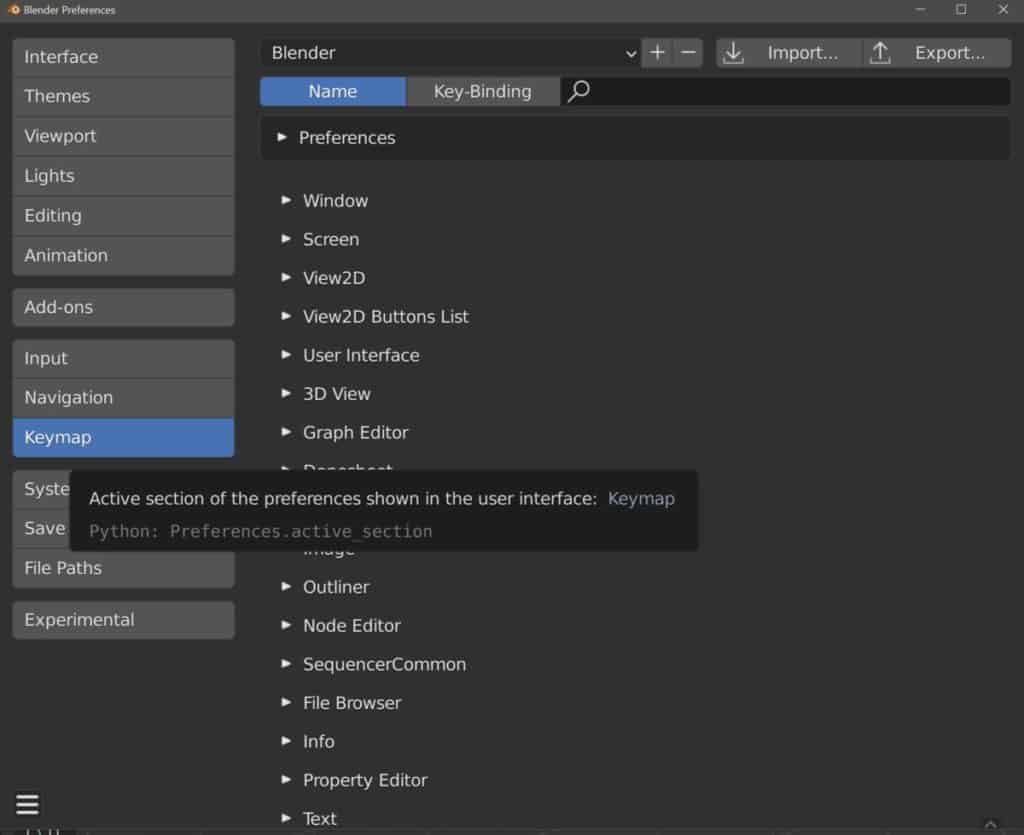
To access your hotkey library go to the edit menu at the top of the Blender interface next to the file, then at the button of the list select preferences. This will open up the preferences panel in a new menu.

To the side, you will find a column of buttons that each takes you to a specific section of the preferences editor. The one that we want to select is the Keymap section, which will open up the keymap library. Here you can use the branch system to locate the hotkeys used in a specific area of Blender.
Adding Shortcuts To Tools That Do Not Have Them
One of the best things about the hotkey system in Blender is that you can reassign what hotkeys are connected to what tools very easily, and there are two methods to change your hotkeys that you can use, the easy way, and the pragmatic way.
The easy way to add a hotkey to your tool is to locate the tool in the menu, for example, the subdivide tool in the edge menu.
Instead of pressing the left mouse button to activate the tool, press the right mouse button instead to open up the context menu for the tool.
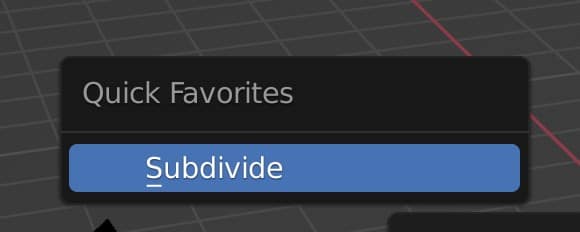
You have a few options here, the first of which allows you to add the tool to your quick favorites menu, which is accessed with the Q key and can be used as a quick menu to the tools that you prefer to use the most.

The second option, if a hotkey has not yet been assigned to the tool, will allow you to add a new shortcut to that tool. When you select this option you will receive a prompt to type in the hotkey that you want to assign to the tool. Make sure that the tool is not already in use for another tool in the same area of Blender.
The next method is to go to the preferences panel and the keymap library. Go to the area where you want to add a new hotkey and scroll down to the bottom of the list. For example, we would locate the section for Mesh (Global) under the 3D view branch to add hotkeys to edit mode.
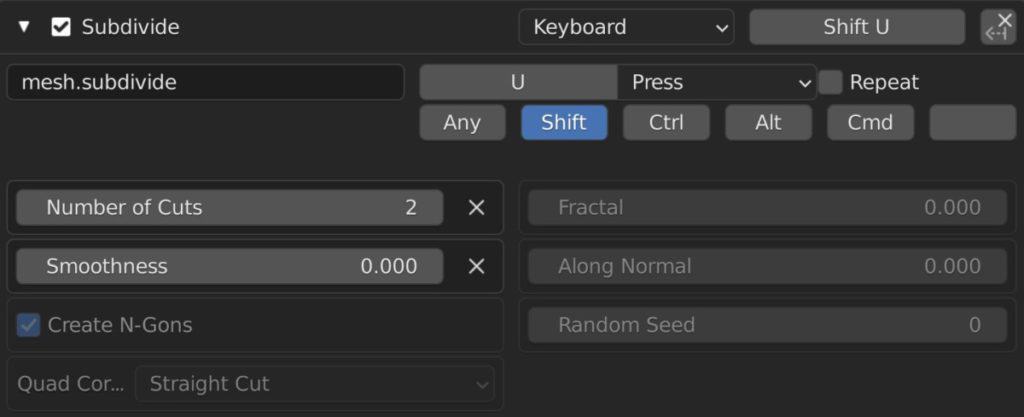
Scroll down to the bottom of this list and there will be an add new button. Click it and it will create a template where you can add the required data, which is the hotkey that you wish to assign and the tool that you want to connect it to.
Typing in your hotkey is fairly self-explanatory, but for the tool itself, we require a specific line of code for the given tool. If we want to add the subdivide tool then we need to locate the tool in its menu. When we do, hover over the tool name for a couple of seconds and a tooltip will appear. The python script that we need will be in the greyed-out text.

We only need a part of this, so go back to the preferences panel and for the subdivide tool type in mesh.subdivide exactly as it is written here. Blender will automatically connect the tool to the key and you will then be able to edit the starting parameters of the tool underneath.
When finished close the preferences panel and test to see if your hotkey is working correctly.
Many Thanks For Reading
We appreciate you taking the time to read through our content. We hope that you found the information that you were looking for. Below we have added a list of additional topics that you may be interested in reading…
- What Are The Hotkeys Used In Object Mode?
- What Hotkeys Are Use For 3D Modeling?
- What Are The Blender Shortcuts Used For 3D Animation?
- How To Assign A Hotkey To A Tool?
- Learn To Speed Up Your Workflow With Blender Shortcuts
-
Light Baking for Blender Game Assets
Enhancing game assets with efficient light baking techniques in Blender.
-
Optimize Render Settings in Blender
Optimizing Blender render settings for quality and efficiency.
-
Node-Based Compositing in Blender
Exploring the power of node-based compositing in Blender.
BEGIN LEARNING AND DEVELOPING WITH OUR BLENDER VIDEO SCHOOL!!
Check out our course library if you are looking for a systematic and effective way to improve your skills as a 3D artist. Click Here To Learn Blender The Right Way!

