
In Blender, we can animate any object within our scene, including the lights and camera. A common animation is to have your camera track a specific point of reference, such as a mesh object. When the object moves, the camera will rotate to keep the object in view.
To track an object using your camera, first select the camera object and then go to the Constraints tab in the properties panel. Click where it says add objects constraints and open up the menu. In the track category, select the track to option. Then set your target to be the object that you wish to track. Now when you play your animation, the camera will track that object.
The ability to animate your camera is equally important as the ability to animate the objects within your scene, as cameras will not always be in a particular position depending on the style of animation that you wish to create.
Why Is The Tracking Tool Useful?
If you are a beginner to animating in Blender, your first fault for having the camera track the object would have been to simply rotate the camera to match the movement of the objects it was trying to track. This would involve taking your camera objects and then rotating them in the direction of the target object.
In practice, this does work, although it is far from a perfect workflow. For example, what if you decided to change the direction of the main object? That would require you to change your camera’s rotation values and positioning.
Effectively, we do more work than necessary when it comes to initially tracking our models, and then we have to do double the work when we make changes.
This is why the tracking constraint is so helpful. It allows us to adjust the camera’s view automatically so that it is always looking directly at its point of reference when moving that model.
Tracking A Still Object
Before attempting to track your camera to a moving object, experiment with the tool to see if you can track a still object.
To enable the tracking constraints, select your camera objects and then go to the object constraints tab in the properties panel.
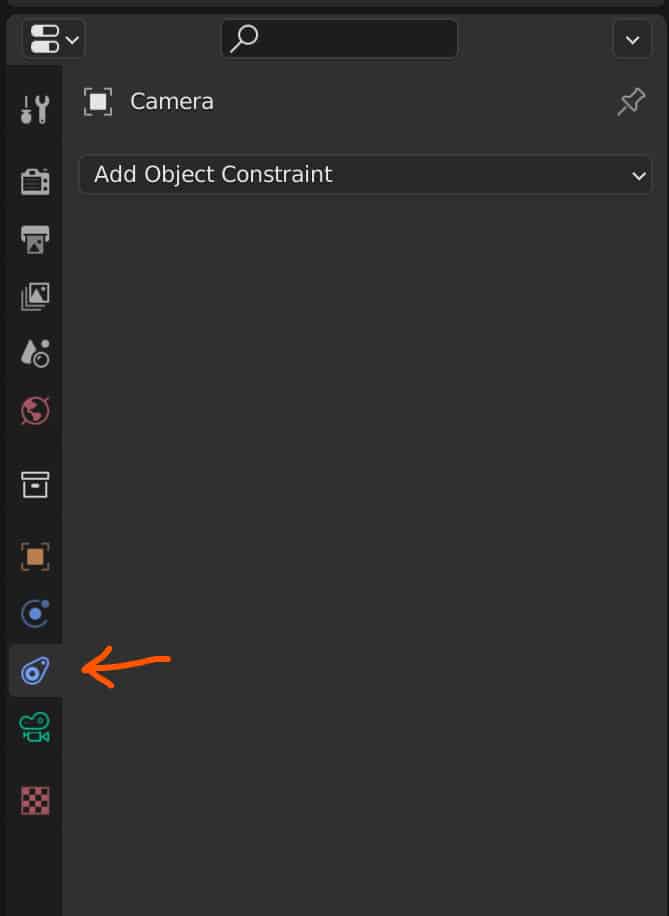
Select the add objects constraint option at the top of this panel, and you will be greeted with a menu full of different constraints you can apply to your camera.
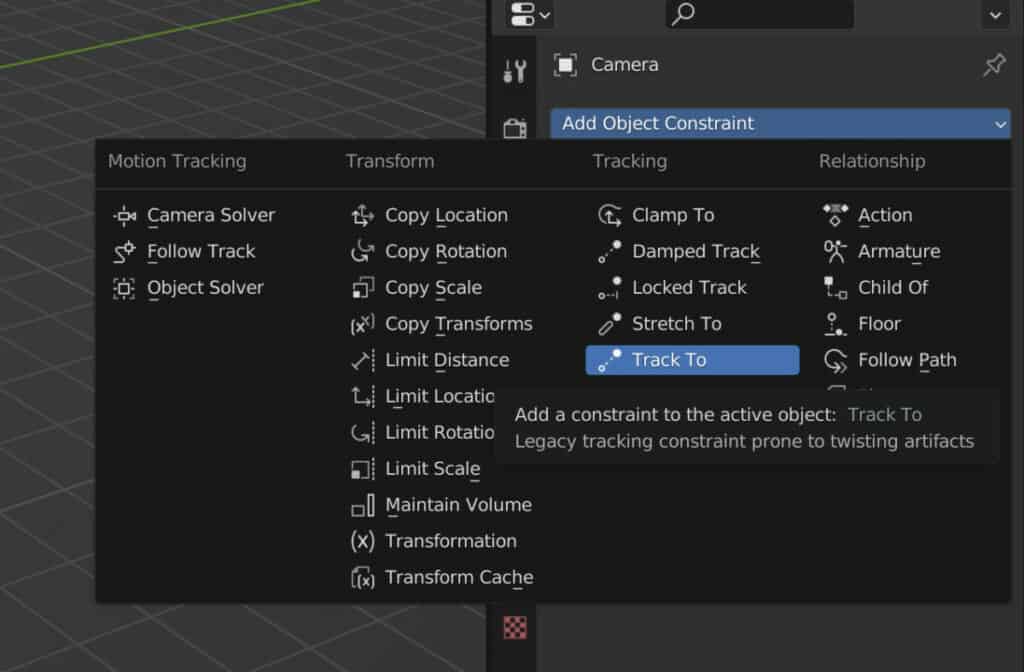
The option that we want is the track two constraint located in the tracking category. So select these constraints to add them to the camera.
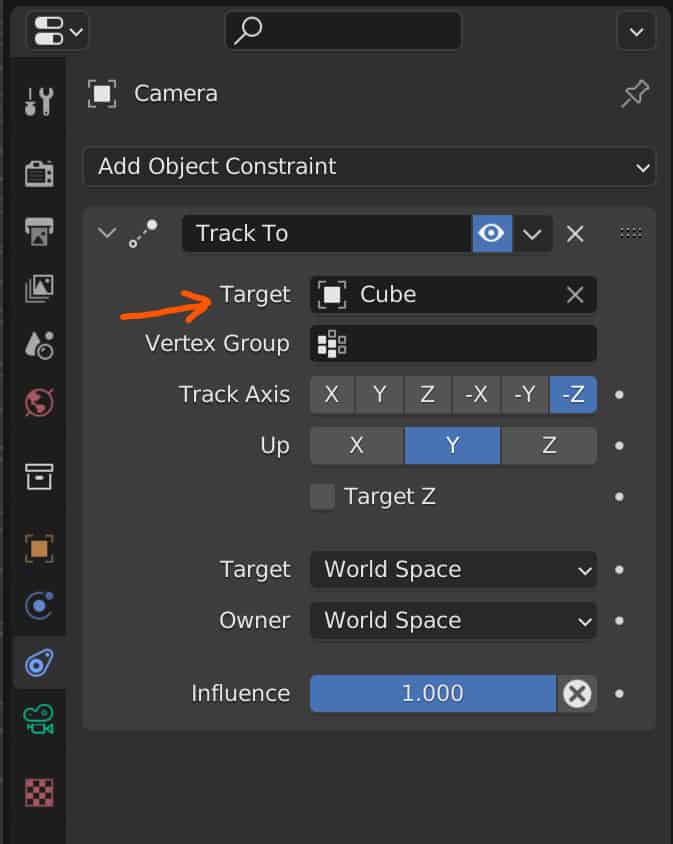
Keep the settings as they are and then go to. The option allows you to pick your reference point and choose a singular object.
If you have successfully connected your camera to your object, try moving the camera around your scene. If this is works, you will notice that the camera itself will always be pointing towards the object. It will automatically rotate when moved to see its points of reference.
Tracking A Moving Object
The process of tracking a moving object is identical to tracking a still object, the only difference being that we are moving the mesh through the scene instead of moving the camera.
Position your camera where it can view your scene and primary model. Go to the properties panel and add your track to constraint for the camera object. Set the target to the model that is being animated.
Now, if you play your animation in your timeline, the camera should be able to track the object’s movement.
For a better preview, use the 0 key on your number pad to go into your camera view to see more accurately how your camera is tracking the model.
What If Tracking Does Not Work
As with any tool in Blender, there are going to be times when the tool does not function properly. The most likely scenario here would be if the camera was not facing directly towards the object when tracking was enabled.
A similar issue could be the rotation of the camera, which can sometimes be oriented in the wrong axis when the track to constraint is enabled.
For both of these issues, the easiest solution is going to be to change the target and up axes options in the properties panel.
By default, you should find that the tracking axis is on the minus Z, while the up axis should be set to Y. This should be the correct axes in most scenarios where all objects are pointing up on the positive Z axis.
If either of the issues above occur, then try setting these two values to something else. Suppose the target axis is the same as the up axis. In that case, if you have the target axis set to -Z and then the up axis set to Z, you will find that the constraint does not function correctly because these two need a different axis. It doesn’t matter if you’re using the positive or negative version of the target axis.
If you still have problems despite trying out different combinations of these axes, another solution could be to check the rotation of your target geometry.
If the rotation is something other than 000, this could cause an issue with the tracking constraint. Make sure to apply the rotation of your target objects.
Thanks For Reading
We appreciate you taking the time to read through this article, and we hope you found the information you were looking for. If you’re interested in learning more about using the camera to animate your scenes in Blender, look at some of the articles we have listed below.
- Using The Turnaround Camera Add On
- How To Use The Camera In Blender Beginners Guide
- How To Create A Carousel Effect Easy Method
- How To Animate Text
- What Is An Empty And Different Ways To Use Them
BEGIN LEARNING AND DEVELOPING WITH OUR BLENDER VIDEO SCHOOL!!
Check out our course library if you are looking for a systematic and effective way to improve your skills as a 3D artist. Click Here To Learn Blender The Right Way!
