One of the reasons why you would want to use Blender is to create 3D animations. Like many 3D modeling applications, Blender has a full suite of animation tools that allows you to manipulate your models in any form. With Blender, you can create not only 3D animations but also 2D ones.
Blender uses a keyframe system in order for the user to create animations. With keyframes, you position a start and end frame where a singular value changes between those two frames. This value can be any changeable parameter in Blender, such as an object’s location, rotation, or scale.
Keyframes provide the basis for all animations within Blender, and you can use keyframes to animate any blender element with a changeable value. You also can go far beyond just adding keyframes, as you have full control over the behavior of your keyframes as well.
Can Blender Be Used For Animation?
Blender can perform various tasks ranging from 3D modeling to sculpting to material application to Python scripting. Blender can be used to complete more tasks than just about any other free application you may find.
But Blender is better at some tasks than others. For example, it doesn’t have the strongest video editing software.
But while the video editing suite may be relatively basic compared to alternatives like Davinci Resolve, the ability to create videos in the first place in the form of 3D animations is something that Blender does very well.
Blender 3D has a full suite of 3D and 2D animation tools. You can use the keyframe system on any object or element within your scene. You can then manipulate your keyframes form within the timeline, dope sheets, or graph editor.
We can even create full rigs for the more complex models to create incredible-looking animations That go far beyond just making a single change to an entire object, such as its location.
With rigs, we can have human characters behave like human characters, moving them any different individual joints and body parts.
On top of all this, we even have a completely separate suite of tools for 2D animation.
How Do We Create Animations In Blender?
In Blender, the keyframe is the most fundamental tool for creating 3D animations. Indie standard layout of the blender interface. You will be able to locate the timeline underneath the 3-D viewport.
Using the timeline, you can preview your content. You cannot only use the timeline controls for play, pause, Fast forward, and rewind, but you can also click and select specific frames within your animation’s frame range.

This functionality is important because it allows us to insert keyframes on any of these numbered frames.
To create a keyframe, first, locate the parameter to that you wish to add a keyframe. Let’s take a look at a couple of examples.
Say if we wanted to manipulate the rotation of a cube so that it rotates on the Z axis. We can start by selecting our cube in the 3D viewport and pressing the I key on our keyboard.
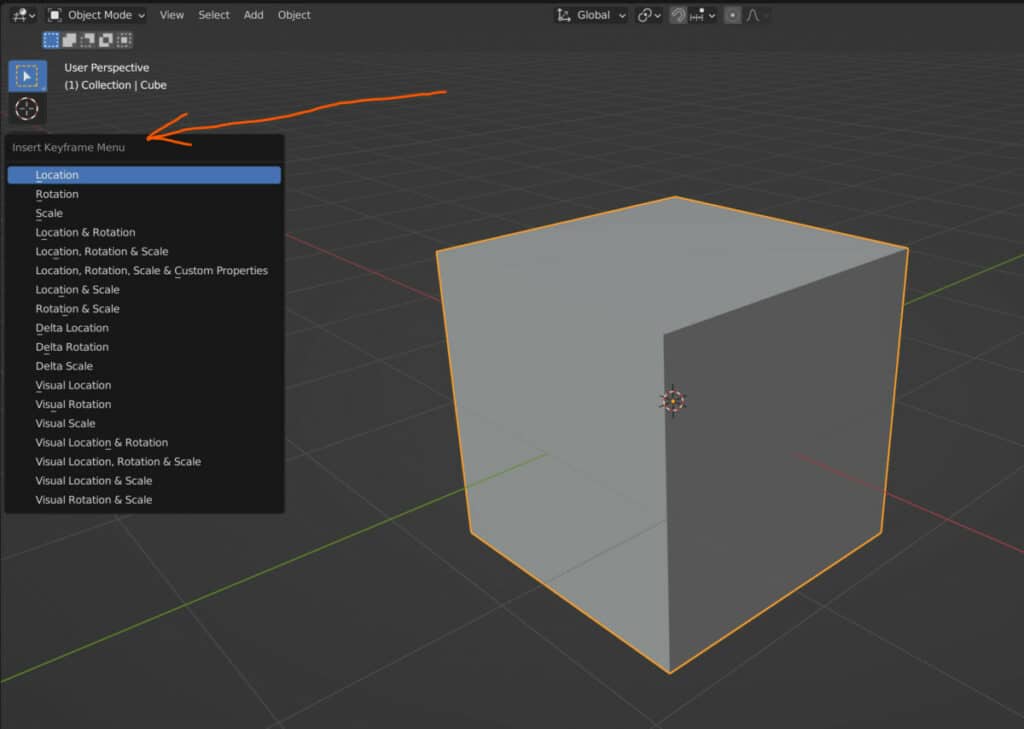
This will open up our insert keyframes menu, and we will have a lot of options to choose from. If we select rotation, we will add a keyframe at frame one, which is the frame that we should company beyond for the rotation values of our cube.
We can confirm this by pressing the end key to open up the side panel in the 3D viewport. The rotation values should appear in yellow to indicate that a keyframe has been inserted.
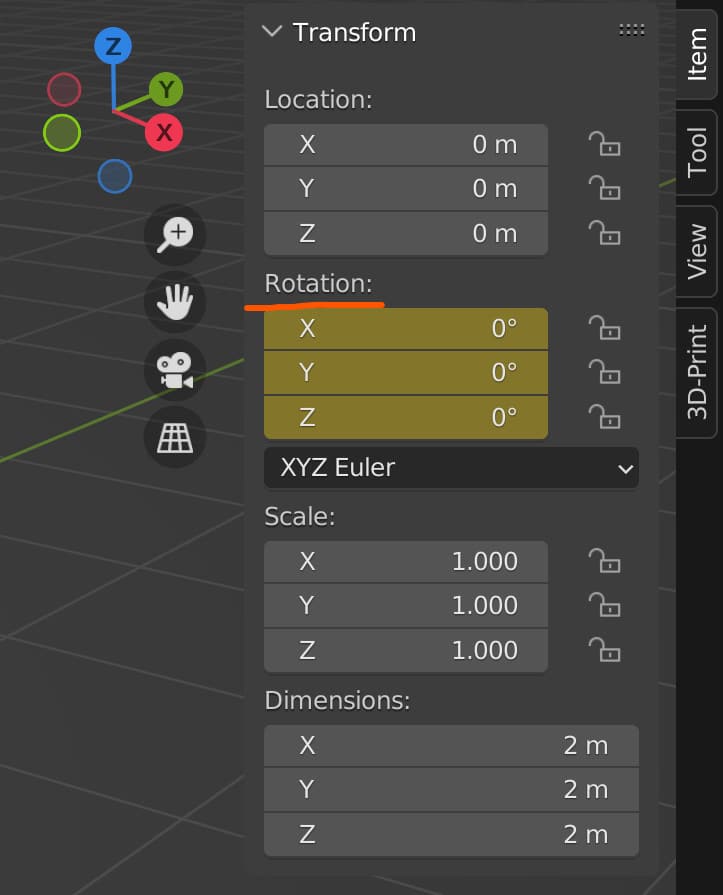
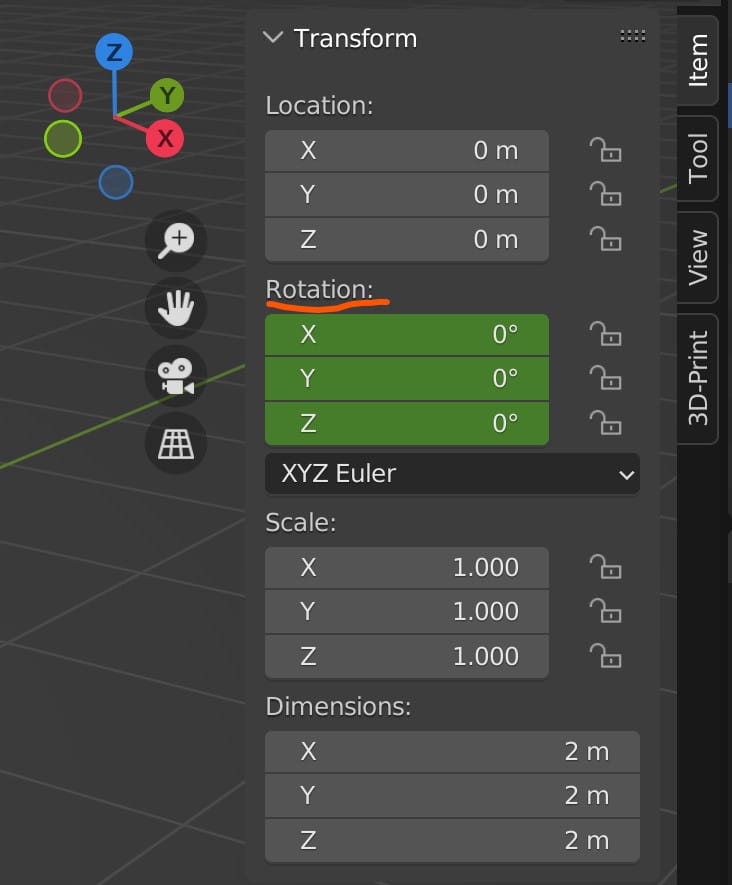
To create a full keyframe, we need to insert a changed value of the rotation at another point. Using the timeline, we can select any frame we want, for example, frame 120.
When we do this, the color of the rotation values in the side panel will change to green to indicate that we are on a different frame and can change the value and create a second keyframe.
Another way of inserting a keyframe is to directly on a specific parameter. So if we hover over our rotation values and then change the see value to 360, which is a full rotation. We can press the I key to insert a keyframe at frame 120 for our rotation.
The Z value specifically will once again appear as yellow. This is because it is the only value changed with this keyframe. Now, if we go back to frame one and press the play button, you will see that throughout 120 frames, the cube will rotate 360 degrees.
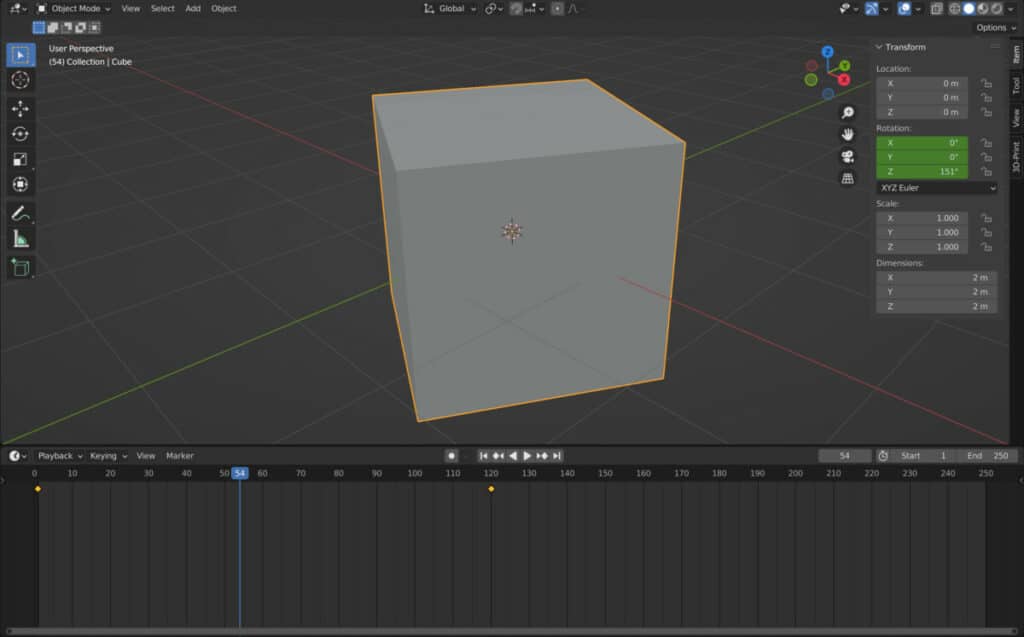
If we want to delete keyframes, we can select them in the timeline and then press the delete key while the mouse hovers over the timeline panel.
Another example is the ability to change a specific value in the properties panel. There are many values that we can change here. If you were to go through all of the different settings in the properties panel, you would find that many of them have a small white dot to the side.
This indicates that you can insert a keyframe for that specific value, and you can do so either by hovering over the value and pressing the I key or by clicking on that little white dot.
For example, we could add a wireframe modifier to a cube. And then, we can press the I key on our thickness value to insert a keyframe.
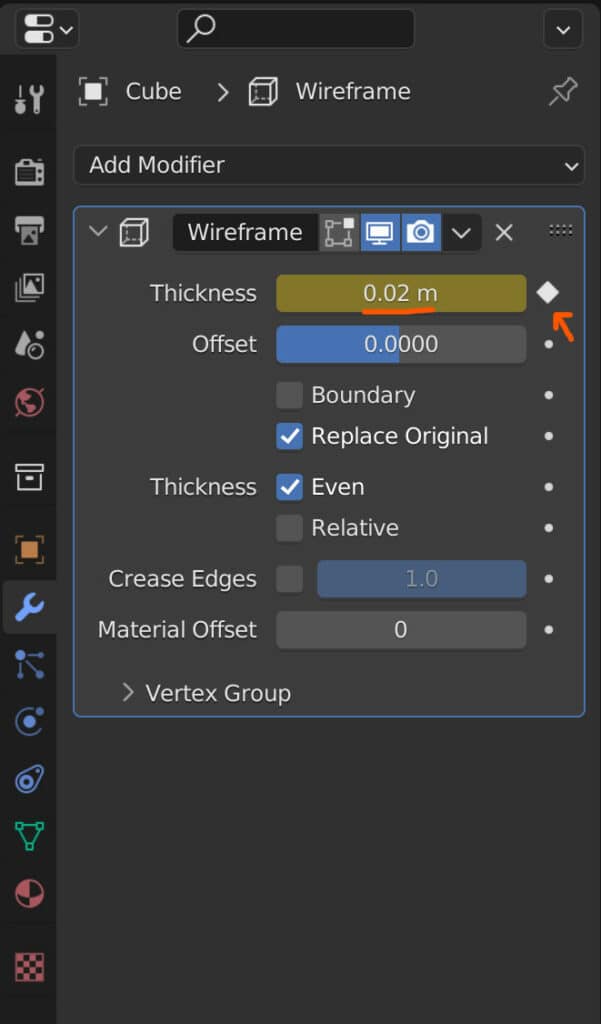
We could then move to another frame in the timeline. Let’s go back to 120. And change the thickness value. Either press the I key again or click on the dot to the side of the value to insert a new keyframe.
Now, if you were to play the animation in the timeline from the start, you would find that the thickness value for the wireframe modifier has been animated.
This represents the absolute basics of how animations are created in Blender.
What Should You Do Before Creating Any Animation?
Before you even begin modeling the objects you will use for your animation, there are a couple of things to note.
First, you must ensure that your blender project’s settings are the settings you want when you render the animation.
The settings that I’m referring to include the frame rate, the frame range, the resolution, and the file output you will send the animation to after rendering.
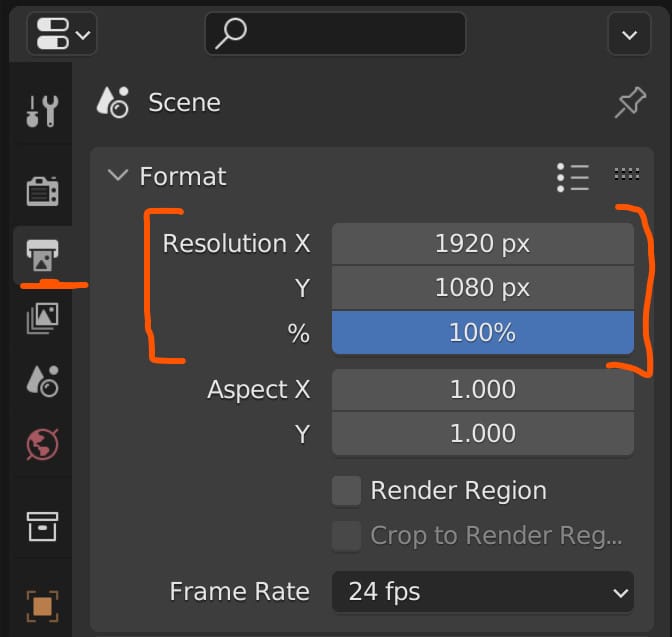
All of these values can be changed in the properties panel by going to the output properties tab. The first one you can change here will be the resolution. Make sure to find the resolution because it will heavily impact the rendering time.
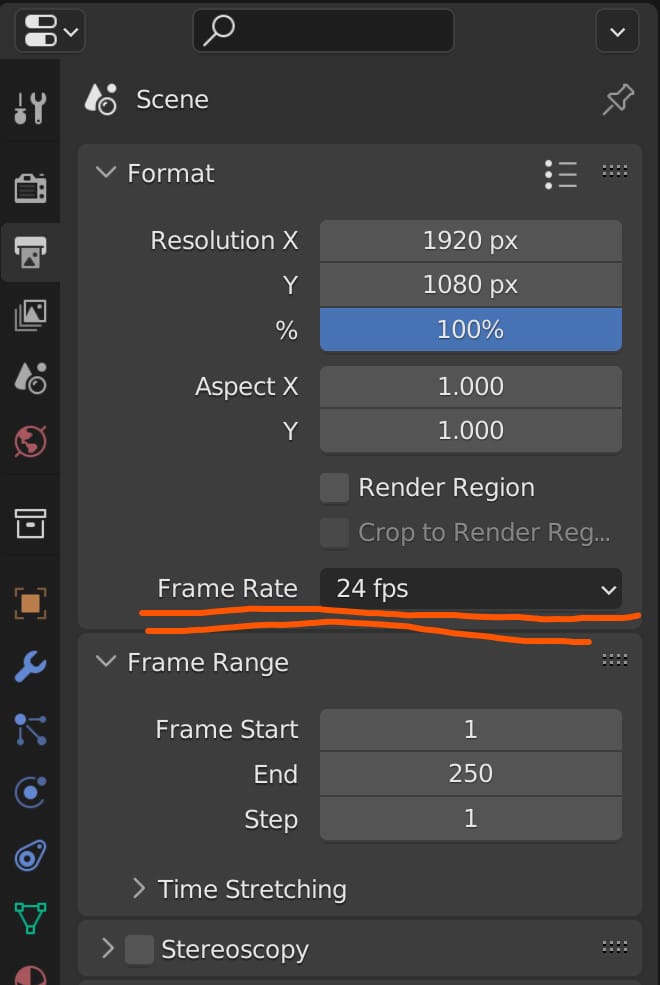
Below that, you’ll have access to the frame rate. This is perhaps the most important value to change before creating your animations. Changing the frame rate after you’ve inserted your keyframes will change the speed at which your keyframes actions perform.
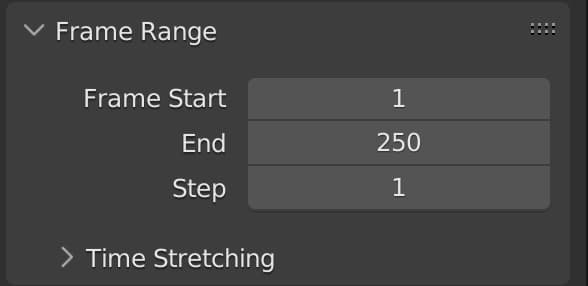
The frame range represents the total number of frames for your animation. This should be taken into consideration alongside your frame rates. For example, if you are going with a four-second animation and you’re going for 60 frames per second, then the frame range needs to be 60 * 4, which is 240.
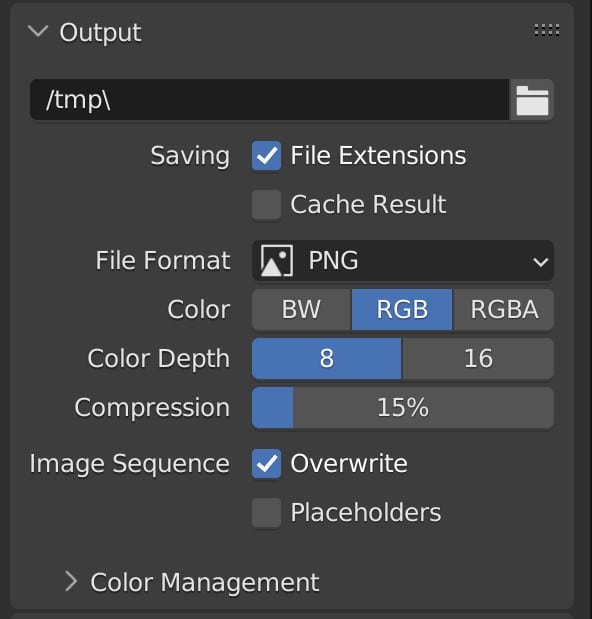
Finally, you have a file output, where you will send your rendered animation. By default, this is going to be set to a temporary folder. We want to click on the folder icon and create a new folder on our computer that will be dedicated to our animation. We’ll set it as the file path and then close the window.
In addition to the location that the fire was going to be sent to, we can also change what the file will be. By default, it sets a PNG, a common choice for many 3D artists and animators as they would like to create image sequences of their animations first.
They would then look to convert these image sequences, a set of numbered images that act as individual frames. And convert them into movie files.
If you want to skip this step, however, you can change the file format from PNG to a movie file format such as FF MPEG. You would then go into the encoding settings, changing the container and the file.
So long as you ensure that these settings are ready to go before you begin creating the animation, you shouldn’t have any problems when it comes to rendering.
What About 2D Animations?
Blender has a full suite of tools for creating 3D animations, and you can also create 2D-specific animations in the form of drawings with the help of the grease pencil.
This is an entirely different workflow as you use different types of objects than you would expect in traditional free deep workflows.
As a result, you can access the 2D suite of tools by opening a new project and choosing the 2D animation template.
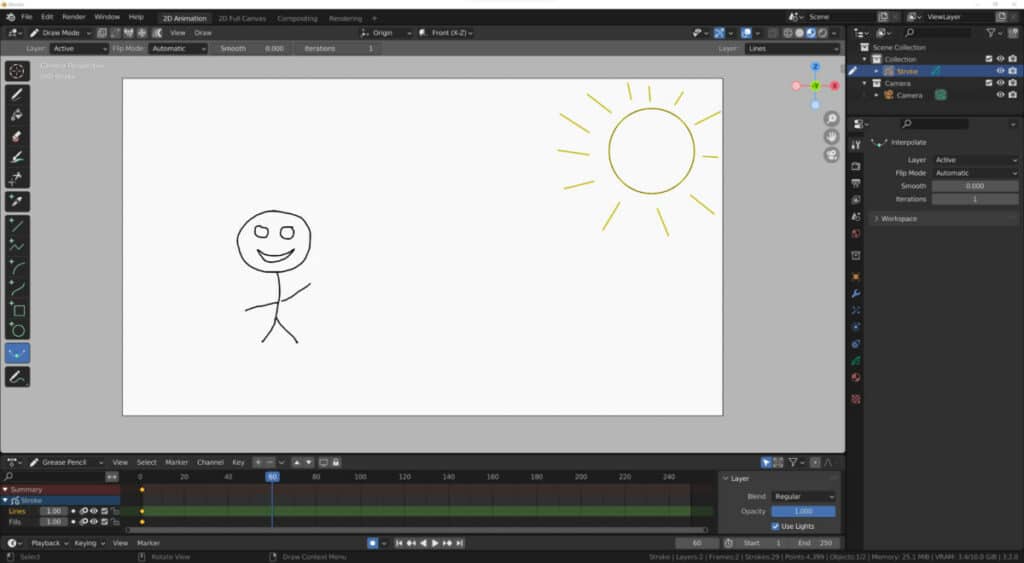
You can use the grease pencil to draw shapes much like you would expect in more traditional 2D applications like Photoshop, even if the actual workflow remains a stark contrast to that software.
The grease pencil and 2D animation are still relatively new in Blender, so there will be a few Areas of improvement if you wish to dabble in this field. However, it remains a fantastic tool as it allows you to not only draw In two days but also allows you to animate your drawings as well.
Thanks For Reading The Article
We appreciate you taking the time to read through the article, and we hope you found the information you were searching for. If you are interested in learning more about how Blender is used for animation, then check out some of the articles listed below.