Mastering Blender’s corrective shape keys is a crucial skill for any 3D artist looking to refine their animations and models. These keys allow for precise adjustments to a mesh, enabling the correction of deformations that can occur during rigging and animation. By utilizing advanced tips for Blender shape corrections, artists can achieve a higher level of detail and realism in their work.
Blender shape corrections are essential for perfecting character animations and ensuring the integrity of a model’s geometry. Advanced tips include using drivers for automated corrections and sculpting techniques for nuanced control. Mastery of these techniques elevates the quality of 3D projects.
One common challenge is managing the complexity of corrective shape keys without compromising the animation workflow. This difficulty paves the way for a deeper exploration into perfecting animations with corrective shape keys, where advanced methods can streamline the process and enhance the final output.
Perfecting Animations with Corrective Shape Keys
Corrective shape keys in Blender are essential for ironing out deformations in your animations. They allow you to tweak a model’s pose to perfection. By creating these keys, you can adjust vertices in problematic areas without altering the base mesh.
Start by identifying the pose that requires correction. Once located, use shape keys to make the necessary adjustments. This process involves adding a new shape key specifically for that pose.
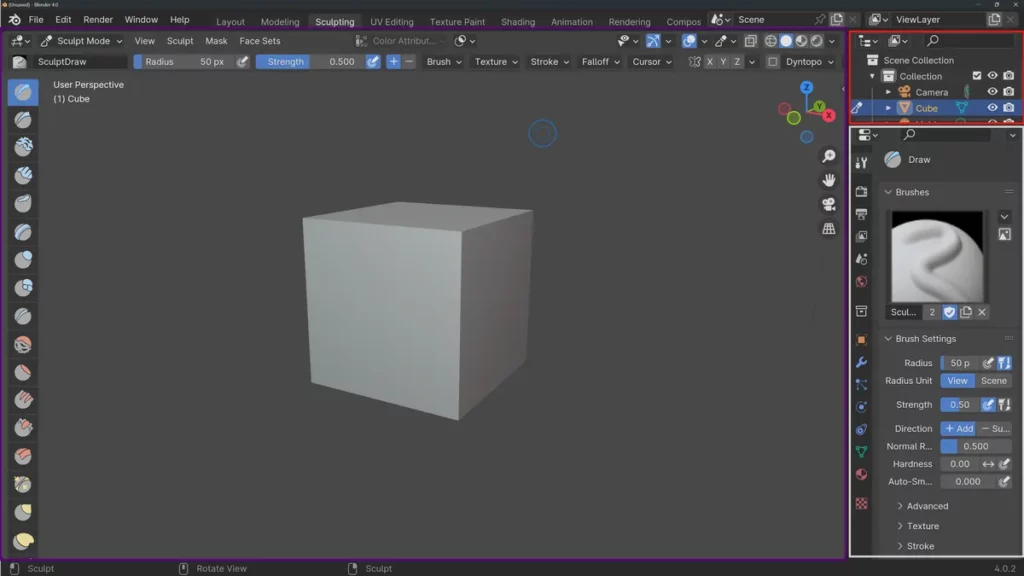
To add a corrective shape key, first, ensure you’re in Object Mode. Then, go to the Properties panel and select the Shape Keys tab. Press the + button to create a new key. Name it appropriately so you can easily identify it later.
Switch to Edit Mode to sculpt the corrective shape key. Adjust the vertices to correct any unwanted deformation. Remember to be subtle with your changes to maintain the model’s integrity.
After shaping, test the correction by moving the related bones. Slide the value of the corrective shape key up and down to see the effect. Fine-tune the shape until the deformation disappears at the problem pose.
For advanced control, use drivers to automate the activation of corrective shape keys. Drivers link the shape key’s influence to the rotation or location of bones. Set these up in the Graph Editor by adding a driver to the shape key’s value.
These advanced tips for using corrective shape keys will enhance your animations. They ensure your characters move naturally, without any visual glitches. With practice, this technique will become an indispensable part of your animation workflow.
Moving forward, let’s delve into how to streamline this process with custom scripts in Blender.
Fine-Tuning Blender Animations
Fine-tuning animations in Blender is a critical step to elevate your project’s quality. Start by scrutinizing your keyframes in the Timeline. This allows you to ensure that movements are smooth and timings are precise.
Adjust the speed of animation with the Graph Editor. This tool gives you control over the interpolation of keyframes. With it, you can create more natural movement by easing in and out of motions.
Sometimes, fine-tuning animations in Blender requires adjusting individual vertices. Use the Shape Key Editor to make subtle changes that enhance expressions or correct deformations. It’s a powerful feature for achieving the perfect animation detail.
For more intricate control, turn to the Dope Sheet. Here, you can refine timing and coordinate actions across multiple objects. It’s essential for synchronizing complex sequences and fine-tuning animations in Blender.
Remember to preview your animations regularly. Press Alt + A to play the animation and observe how your adjustments impact the overall flow. This instant feedback is vital for iterative refinement.
Each change, no matter how small, contributes to the believability of your animated scene. Take the time to review and tweak as necessary, always striving for that seamless animation.
As you master these tools, your animations will gain fluidity and expression. The next section will delve into the art of adding secondary motions, which brings character movements to life and adds another layer of realism to your work.
Enhancing Animation Quality with Shape Corrections
Enhancing animation quality with shape corrections is a game-changer in Blender. By tweaking the pose of your character, you can avoid unnatural deformations. This ensures that each frame of your animation maintains a high level of visual fidelity.
To begin enhancing animation quality, select the problematic mesh area. Use the Shape Key tool to make corrections that refine your character’s pose. These fine adjustments can make a dramatic difference in the final output.
Remember, enhancing animation quality is all about subtlety. A slight tweak with a Proportional Editing tool can smooth out a joint’s movement. This level of detail will give your animations a professional polish.
Shape corrections come into play significantly during facial expressions. They allow for precise control over emotions being portrayed. Enhanced animation quality here can bring a character to life, conveying intricate feelings.
To implement these corrections, you may need to add new shape keys. Do this by pressing Shift + I in edit mode. Then, sculpt the desired expression or adjustment for your character’s mesh.
Animating with shape corrections requires patience and a keen eye for detail. Always preview your adjustments in motion. Iterate until the movement looks natural and enhances the animation quality overall.
Keep these tips in mind as you dive deeper into the nuances of Blender’s capabilities. The next section will further explore the intricacies of weight painting to fine-tune your rigging process.
Adding Subtle Details and Expressions
Adding subtle details and expressions to your animations can elevate them from good to exceptional. It’s in the minute twitches of a character’s eyebrows or the slight tilt of the head that true life emerges. To begin, create a new shape key by clicking on the Object Data Properties panel and then pressing the + button beside the Shape Keys list.
Once you have your base shape key, you can sculpt those finer aspects. For adding subtle details and expressions, work on a duplicate of your base mesh so you can always revert back if needed. Use the Sculpt Mode to refine areas like the corners of the mouth or the eyelids, enhancing the expressiveness of your character.
Animating these details requires a deft touch. Adjust the value sliders for each shape key gradually to see how they impact your character’s expression. Remember to move the sliders for your subtle details and expressions shape keys only slightly; often, a value change between 0.01 and 0.05 is enough to add the desired level of nuance.
Keep in mind that less is often more with adding subtle details and expressions. It’s easy to overdo it and end up with a character that looks unnatural. Strike a balance and continually check the overall effect by playing back the animation sequence. Use the Timeline editor to scrub through your animation and make sure your subtle details enhance, rather than distract.
Your animation is now brimming with life and realism, thanks to the addition of subtle details and expressions. These small tweaks can make a huge difference in how audiences connect with your characters. Next, let’s explore how to polish and refine these details to perfection.
Advanced Animation Techniques in Blender
Unlocking Blender’s full potential requires mastering advanced animation techniques. Keyframing is fundamental, but to refine your animations, dig deeper into the graph editor. Manipulate the Bezier handles in the Graph Editor to tweak the interpolation of your animations.
Shape keys offer precise control over mesh deformations. For subtlety in facial animations, blend multiple shape keys using the Shape Keys panel. This level of detail makes characters come to life with realistic expressions.
Drivers in Blender are powerful tools for creating relationships between properties. By using drivers, you can automate complex movements. For example, link a character’s eyebrows to move with their eyelids for a natural look.
Constraints can also enhance your animation workflow. Use the Bone Constraints to simulate real-world physics or to lock certain movements. With proper constraint settings, characters can interact with objects more convincingly.
For quick changes without altering keyframes, use the Pose Library to store and apply common poses. This speeds up the animation process, especially for repeated actions or gestures.
By incorporating these Blender advanced animation techniques, your projects will gain new dynamics and realism. Practice these methods to see how they can transform simple movements into complex, lifelike animations. Our next section will delve into rigging intricacies to further refine your animation craft.
Adjusting Deformations and Poses in Blender
Blender is a powerful 3D modeling software that allows you to create intricate designs and animations. One of the key features of Blender is its ability to manipulate shapes and poses of objects. In this article, we will explore some advanced tips for adjusting deformations and poses in Blender.
| Step | Technique | Description |
|---|---|---|
| 1 | Utilize the Armature Modifier | The Armature Modifier in Blender helps create skeletal structures for models. Add an Armature Modifier to your object, create bones, and control each bone’s influence using Weight Painting. |
| 2 | Use Shape Keys | Shape Keys allow creation of different mesh variations. Adjust deformations easily without manual vertex manipulation. Create multiple Shape Keys for various poses and animate between them. |
| 3 | Corrective Shape Keys | Use Corrective Shape Keys to fix undesirable deformations. Sculpt the mesh to correct deformation issues, useful for complex rigs or animations. |
| 4 | Rigging and Weight Painting | Rigging involves creating a skeletal structure, and Weight Painting assigns weights to bones for mesh deformation control. This allows precise adjustment of poses and deformations. |
By utilizing these advanced tips for adjusting deformations and poses in Blender, you can take your 3D modeling and animation skills to the next level. Experiment with different techniques and tools to find the best workflow for your projects. Happy blending!
BEGIN LEARNING AND DEVELOPING WITH OUR BLENDER VIDEO SCHOOL!!
Check out our course library if you are looking for a systematic and effective way to improve your skills as a 3D artist. Click Here To Learn Blender The Right Way!
