Animating in Blender requires us to not only create keyframes for our animations but also manipulate them by changing the interpolation of those frames and how they interact. The manual way to do this is to change how the handles are used for each keyframe in the graph editor.
To change the handle type, open the context menu for the keyframe using the right mouse button and locate the options for the handle type, or use the V key to access the same menu in the graph editor. You can also click and drag on the handles, change the interpolation and even adjust the easing mode to change how your keyframes affect the animations.
While handles can only be manipulated in the F-curve of the graph editor, they are core to how the keyframes can affect the values being animated and how you can control how the animation appears in motion.
What Are Handles In Blender Animation?
When we create our keyframes in Blender, these keyframes can be visualized in both the timeline and the dope sheet as a white dot that transforms into a larger yellow diamond when the keyframe is selected.
There is no indication of any handles in either of these editor types, as we are limited to basic manipulation of keyframes such as repositioning, deleting, and duplicating.
If we want to view our handles, we need to go to the graph editor instead. The graph editor is not immediately accessible in our workspaces, even the animation workspace. Therefore we need to change the editor type of an existing panel in our chosen workspace.

It is recommended that you change the larger of the two 3d Viewports in the animation workspace, as this will give you enough room to use the graph editor while still being able to view your animation in the second viewport, which views the animation through the camera lens.
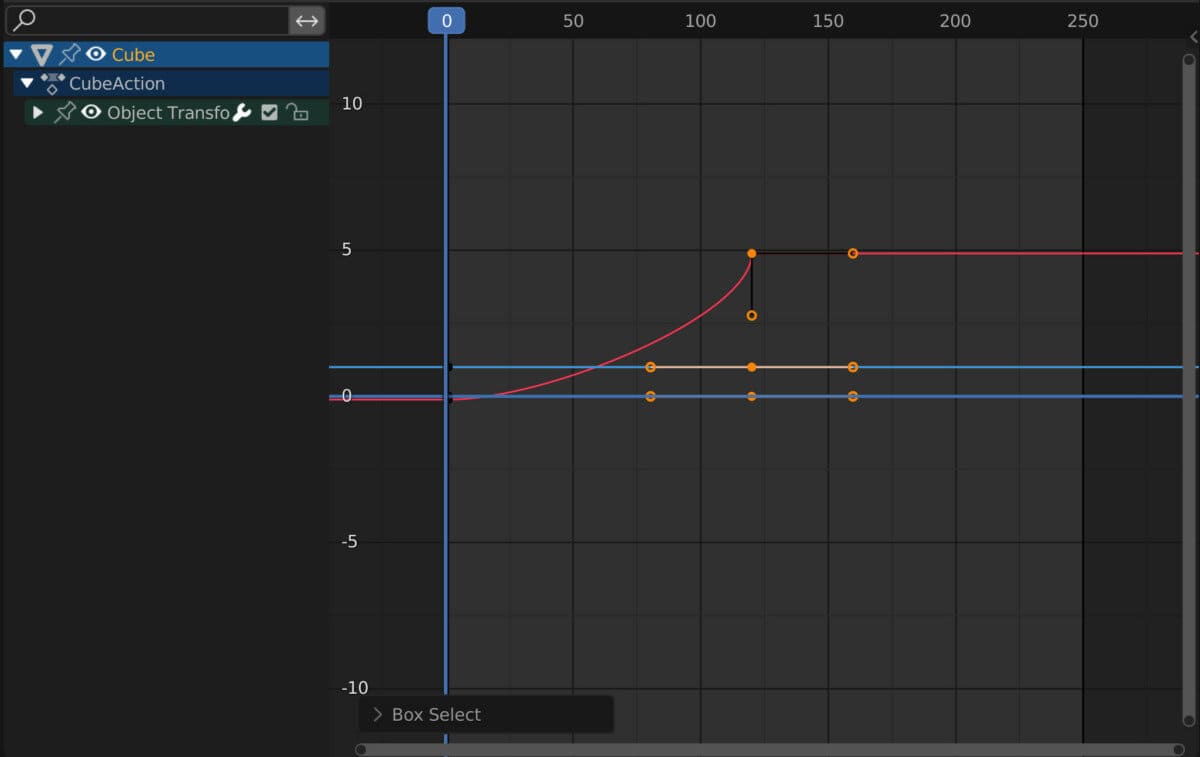
The appearance of the keyframes is different in the graph editor, as they appear as dots connected by curved lines of various colors.
Each point has two hollow dots on either side, which we refer to as handles. These handles allow us to control how the keyframes affect our values without actually changing what values the keyframes are.
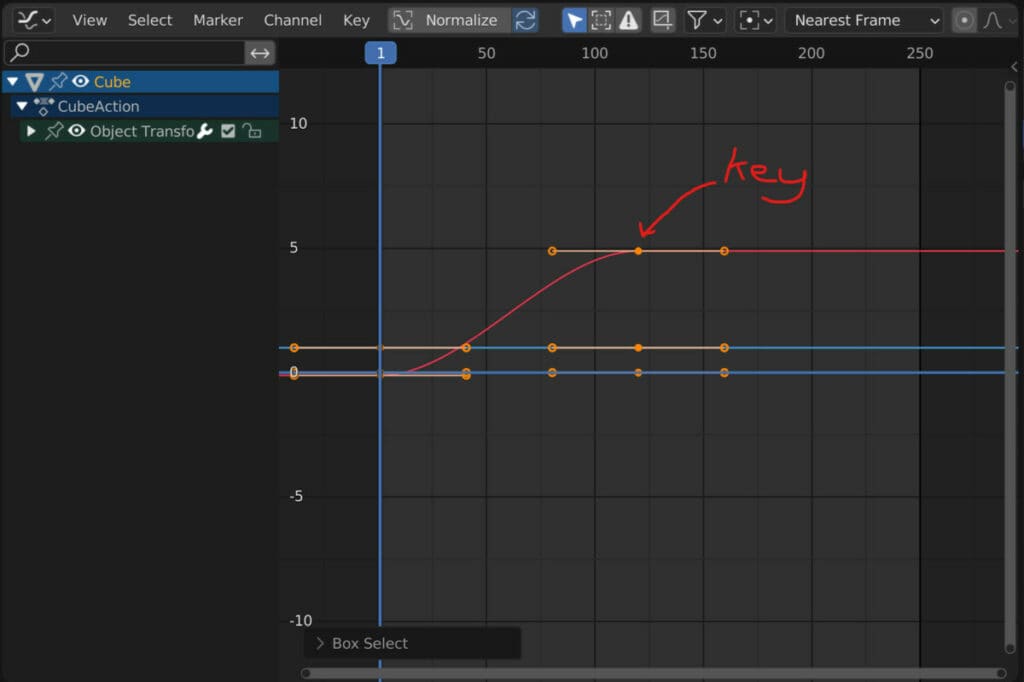
For example, we can use a handle to change the rate at which the value changes from one keyframe to another. This represents the interpolation of the keyframe and can be controlled in different ways.
How To Use Handles To Change How Values Are Altered?
Handles are named as such because we can grab a handle on either side of the keyframe and ‘steer’ the direction of the curves on either side. These curves are the values assigned to those keyframes and how they change as we move through the frames of the animation.
You can click and drag on a handle and reposition it up, down, left, or right from the original position of the handle.
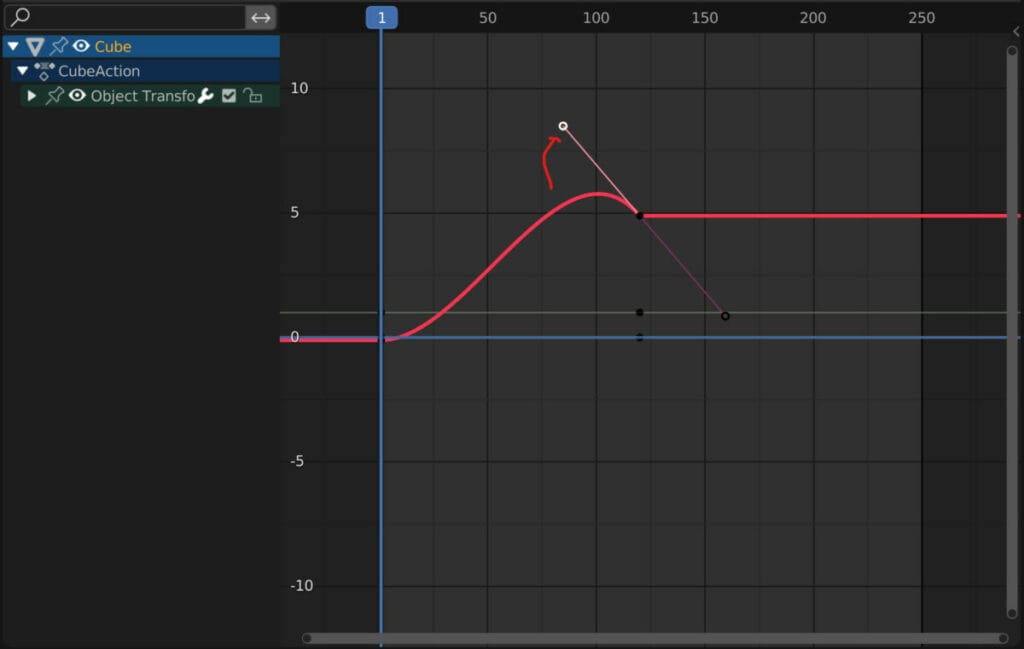
The direction in which the handle is pulled changes the way it affects the keyframed value. If the handle is dragged up, it will push the value up before reaching the keyframe.
Moving the handles will not change the value assigned to the keyframe; this requires moving the keyframe itself. Instead, we change how the value reaches the destination, that is, the keyframe, as well as how it changes after the keyframe.
Pushing the handle up creates a situation where the value overshoots the target of the keyframe. This can create something like a snapback effect.
Pulling a handle down will do the opposite, reducing the value as it reaches the keyframe before quickly recovering as it hits the target value.
In addition, we can drag the handle left and right to move it closer to or further away from the keyframe itself.
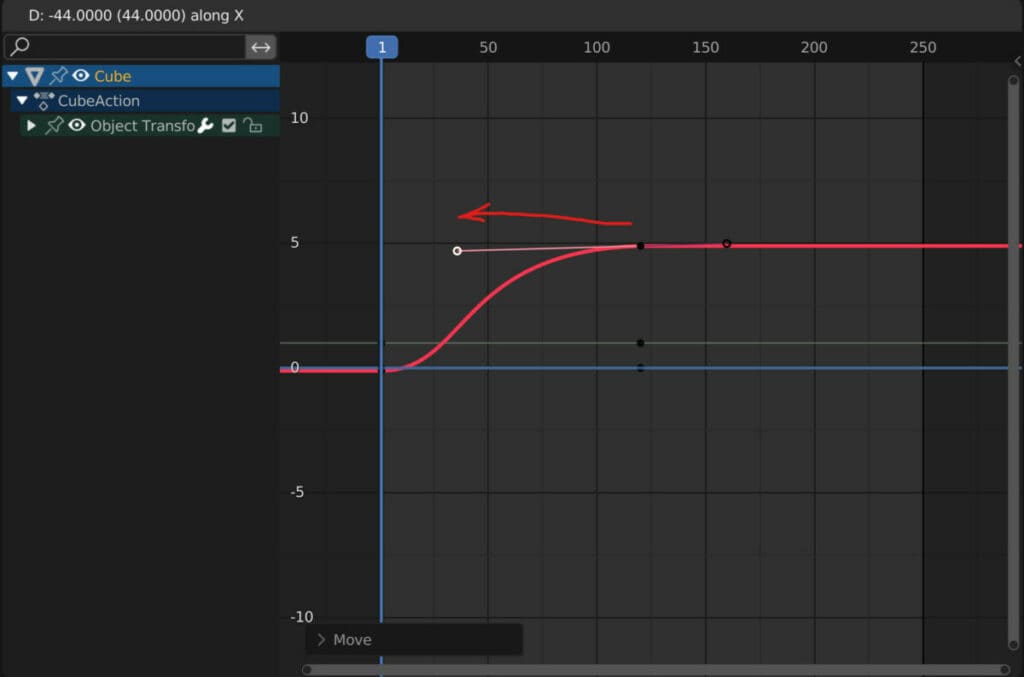
Dragging the handle away from its keyframe can either accelerate or decelerate the change of value depending on what side of the keyframe the handle is on.
For example, if a keyframe were created on frame 120 with an object moving on the X-axis toward the value of 5, then it would reach a value of 4.2 by frame 90.
If we grab the handle of that keyframe and move it close to the keyframe value, it tightens up the interpolation of that keyframe. If we look again at frame 90, the value on the X-axis is reduced and is further away from the target value of the keyframe.
Changing The Handle Types
A slightly more automated way of changing the handle’s influence is changing the handle type used.
There are several ways that we can change how the values change between the keyframes, including changing the handle type.
This menu can be accessed in the timeline, dope sheet, or graph editor, but it is best to change the handle type in the graph editor where you can visually see the change.
Accessing the handle type menu requires using the V key on your keyboard. Alternatively, it can also be located in the graph editor context menu using the right mouse button. The third way to locate the handle types is within the key menu of the graph editor. It will be halfway down this list.
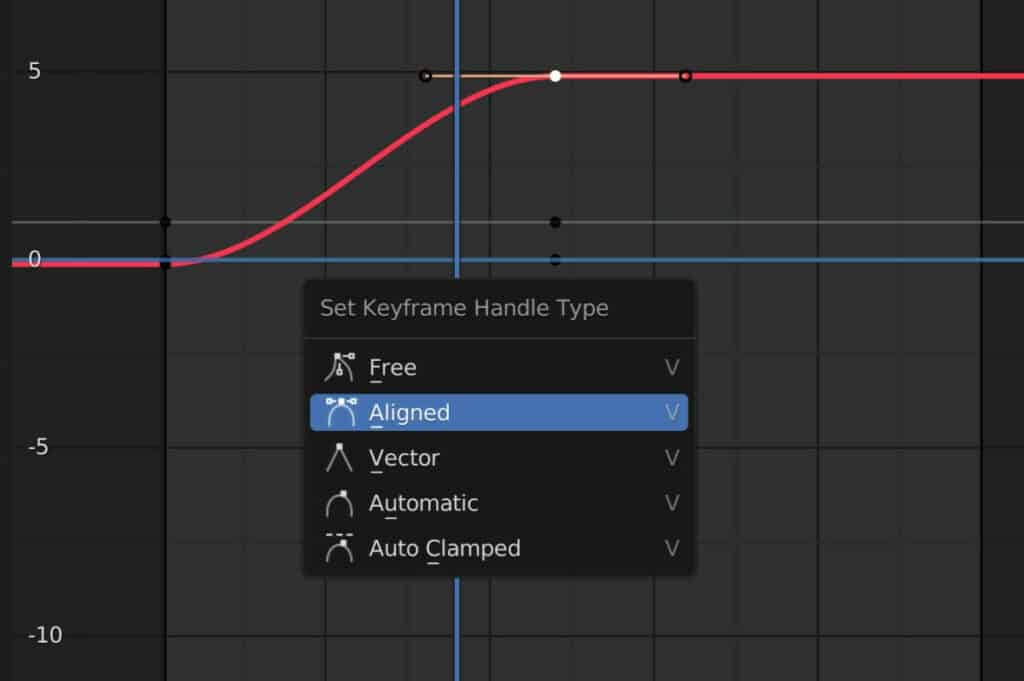
When you have access to the menu, you can choose from 5 different handle types. These are more than preset positions as they change how the handles interact with the keyframe and each other.
The Aligned option is the second on this list but the first one to cover as it is the handle type automatically assigned to any keyframe.
When active, this connects the two handles so that a straight line is always formed across the keyframe point. Moving one handle up on the graph editor will push its paired handle, influencing how the curve forms before and after the keyframe.
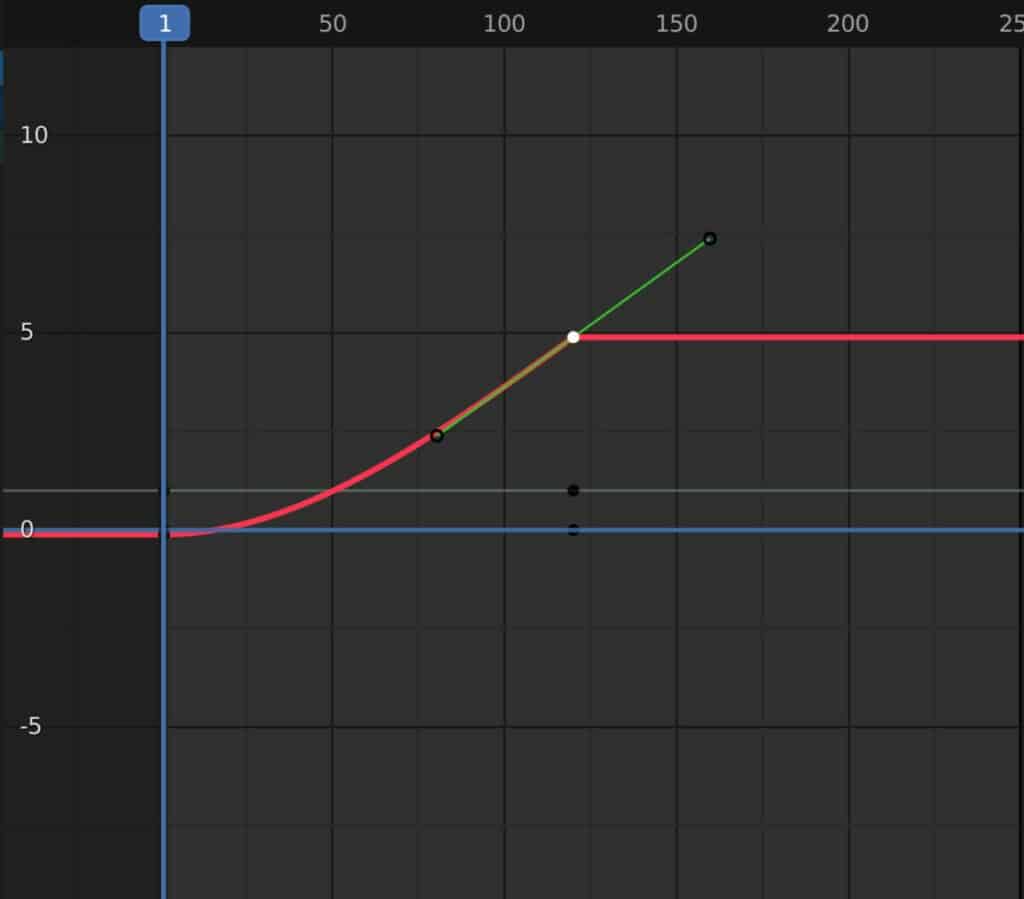
First up in the menu itself is the Free option for your handle type. When active, we gain complete control over where we want our handles to go.
The key difference compared to the aligned option is that the two handles are no longer connected. This is great for when you want to control the value before the keyframe and not after.
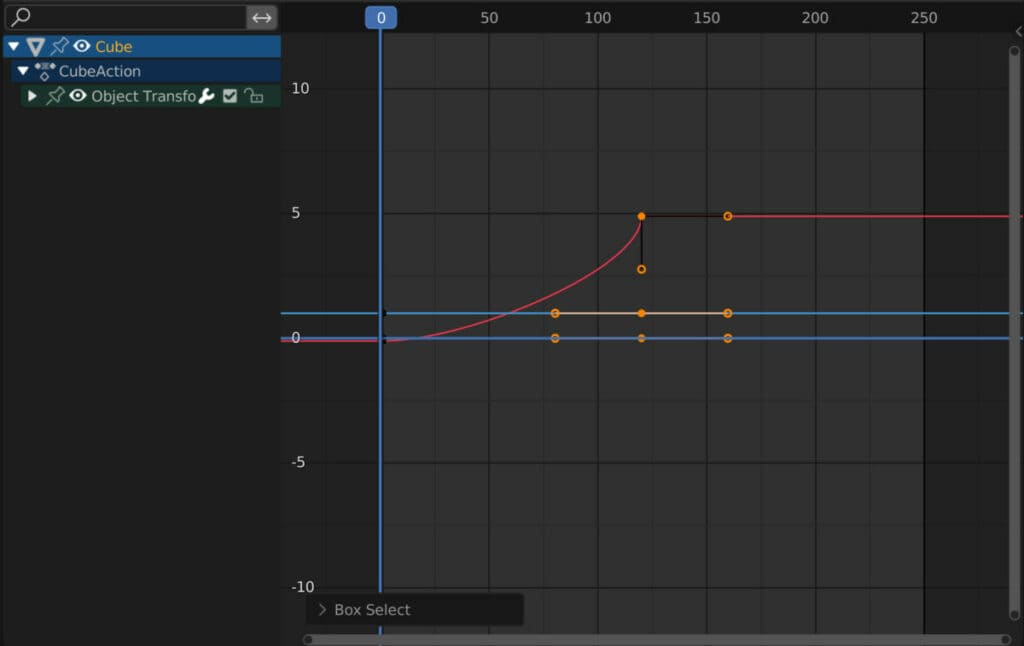
Up next is the Vector handle type. The primary purpose of this handle type is to eliminate variation in speed before and after the keyframe.
Each handle is positioned so that the speed of the animation is constant both before and after. Visually in the graph editor, you will see the handles angled similarly to the value line.
While the handles are precisely positioned to reduce any falloff in speed, they can still be grabbed and repositioned after, like with the Free handle type.
The automatic option works similarly to the aligned handle type, creating a straight relationship between the handles.
One of the key differences between the automatic and aligned options is the orientation of the handles. With the aligned option, the handles and the keyframe within the graph editor are positioned level with each other, offering an excellent base to begin editing.
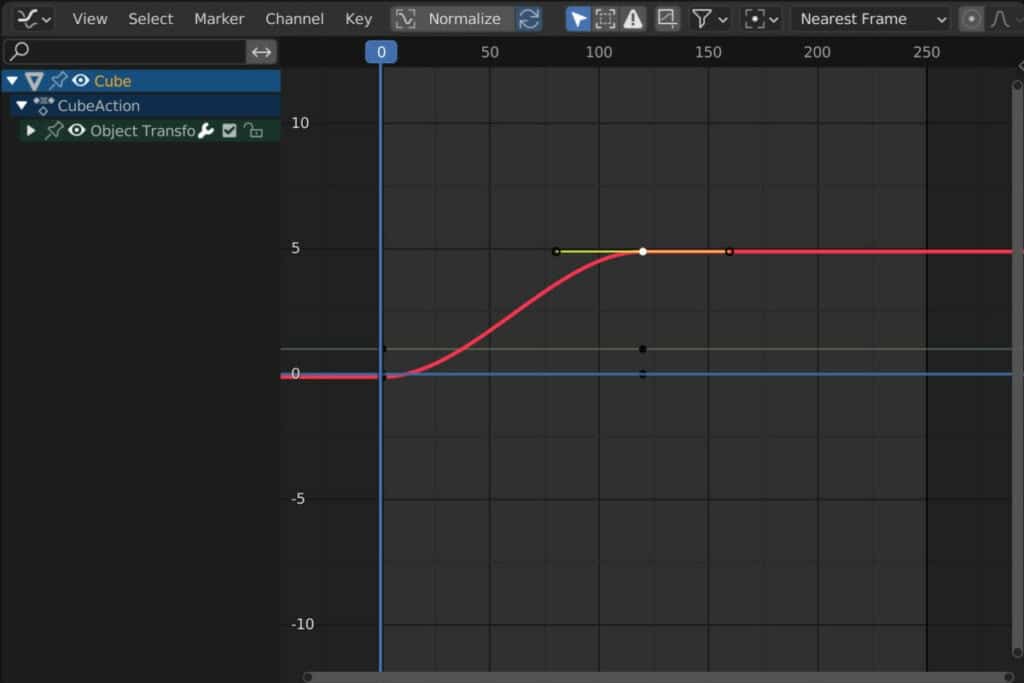
By contrast, the automatic handle type will rotate the keyframe and its handles based on the direction the curve generally follows. This can often create a sharper motion when hitting the keyframe.
Finally, the auto-clamped option allows for a more controlled way to move the handles so that the typical behavior of the keyframe is better preserved.
Other Ways To Change The Interpolation Of Keyframes
A couple of similar tools also allow us to change how the keyframes affect our animations without even having to touch our handles.
These effects and tools can also be found in the graph editor’s key menu and context menu.
Suppose we want to change the overall style of our animation. In that case, we can change the interpolation method, which can be easily accessed via the interpolation menu using the T key in the graph editor.
For different interpolation methods, you can change between three main formats of interpolation, bezier, linear, and constant.
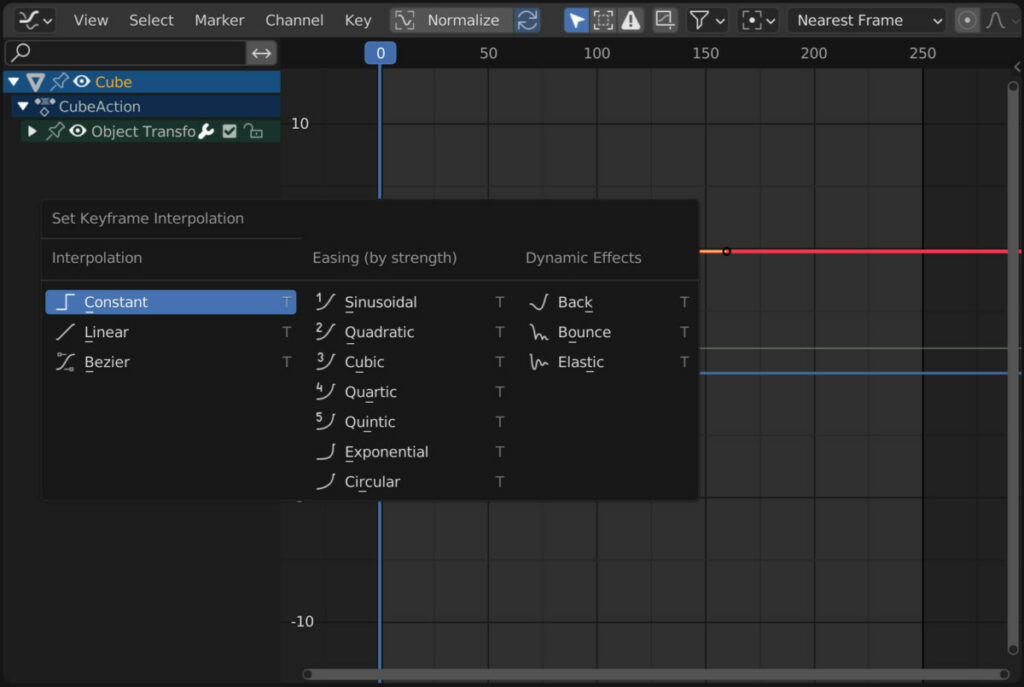
You could even combine the bezier and linear effects using various strengths to the easing mode or apply more complex and dynamic effects such as bouncing and elastic deformation.
Thanks For Reading
We appreciate you taking the time to read through the article. We hope you found the information you were looking for. If you are interested in learning more about the Blender software, you can check out a few of the articles we have listed below.
- How Does Interpolation Work In The Graph Editor
- Creating A Bouncing Ball Animation In Blender
- Using The Graph Editor To Create Animations Beginners Guide
- Using The Dope Sheet To Create Animations Beginners Guide
- Using The Timeline To Create Animations Beginners Guide
BEGIN LEARNING AND DEVELOPING WITH OUR BLENDER VIDEO SCHOOL!!
Check out our course library if you are looking for a systematic and effective way to improve your skills as a 3D artist. Click Here To Learn Blender The Right Way!