At times when designing 3D objects and scenes, you may want to get a preview of the scene in the 3D viewport, and for that preview, you will want it to be as close to the render as possible, and that includes getting rid of all the overlays.
To remove the viewport lines and other overlays in the viewport, go to the button in the top right-hand corner of the viewport and left-click on the button with the icon of a full and empty circle overlapping. You can also access to overlays menu using the arrow next to the button to turn off specific items.
Now you should no longer see any lines in the viewport and have a good representation of your image and what it is expected to look like when rendered. But what about when you only want to get rid of certain items? Which of these can you hide?
How To Create A Preview Of Your Render In The 3D Viewport?
Let’s start by looking at how to fully create that preview of your image. You want to set it up so that your view in the viewport looks exactly how it should look in the render, but without having to render to see it. There are a few steps that need to be completed to do this…
Getting The Camera In The Right Position
The first step is to get your camera in the correct position and then view your scene through your camera, which you can do in the viewport.
A quick way of getting the camera to the right position is to in fact do things in reverse. First, orbit your view so that you have the angle that you want for your render, then you will want to zoom out a little bit.
When we move our camera to this position it is going to snap to the correct location but will zoom in slightly, so zoom out of your ideal view a bit beforehand to correct this.
Then you need to transport the main camera to the location of your view. Select the camera in the outliner and then use the hotkey combination of Control + Alt + 0 on a windows device or Command + Option + 0 on a mac to snap the camera to the current view.
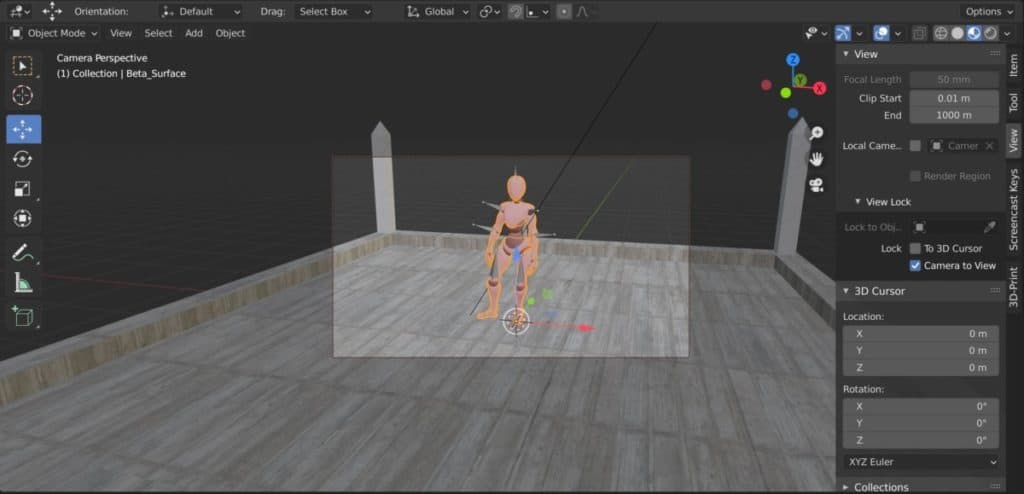
You should also now be looking through the camera when you do this. If you are still not happy with the placement of the camera, go to the side panel in the viewport by pressing the N key, and under the View tab you will see the option Camera To View under View Lock.
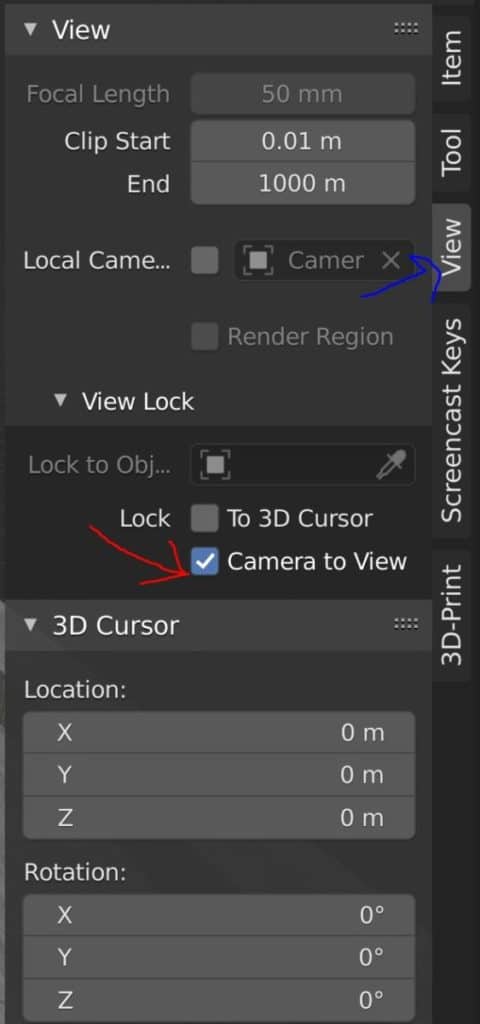
If you enable this option then when you navigate your view you will also be able to move the camera based on your view.
To come out of this setting return to the side panel and untick the box when you have found the correct view. A common error from Blender users is they do not deactivate the tool straight away and then inadvertently navigate away from that position.
Selecting The Correct View Method
The next step is to set the viewport method to match the view conditions of the actual render. There are four viewport shading methods that are visible as a row of buttons across much of the top right-hand corner of the viewport.
From left to right, you have a wireframe view, which displays all of the objects as wired meshes based on their vertices and edges, with no faces displayed.
The next is the solid view, which is the default shading method in Blender. In this view, only the geometry of the objects is visible, which means vertices, edges, and faces.
Then we have the material preview, where in addition to the geometry we have the materials and textures on show, and a placeholder HDRi to preview how the materials react only to an environmental light source.
The final icon is for the rendered view, which displays all of the information in the scene, this includes the geometry, materials, textures, and lighting setup.
The rendered view is the representation of our actual render and allows us to work on our lighting set up in the viewport.
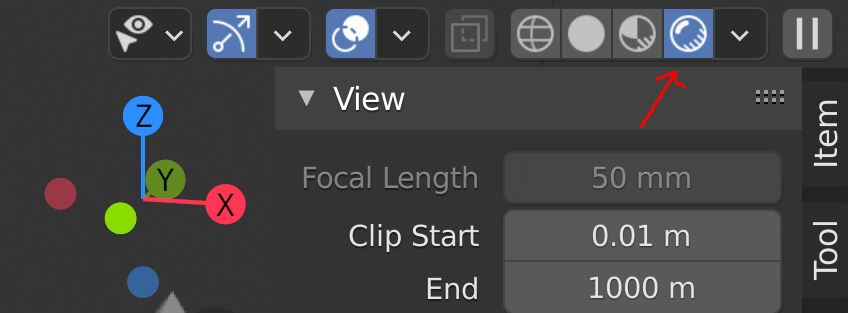
The icon for this button is a circle with a reflection at the top, and lines to indicate shadows at the bottom. Click on this button to switch to rendered view.
Turning Off Your Overlays
The third and final step is the reason why you searched for this article in the first place, to get rid of those pesky overlays.
Doing so requires the press of a single button, and this button is found just to the left of our viewport shading options. Look for the icon of one shaded circle overlapping an empty circle, which will probably be highlighted Blue as it will be enabled at this point, and left click to turn it off.
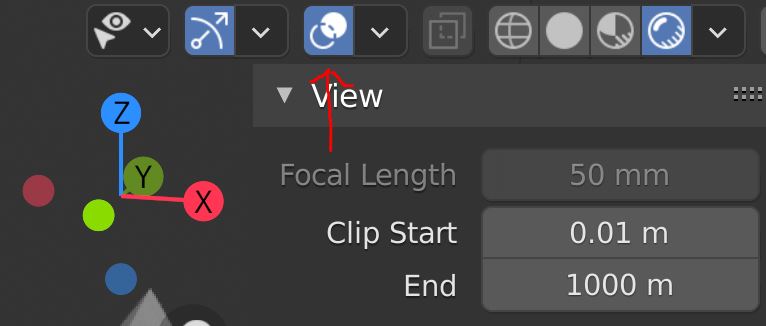
And like magic all of the grid lines and other overlays will disappear from the viewport, leaving you with a like-for-like preview of what you will see after you press the render button.
What Other Reasons For Turning On/Off Overlays?
There may be other reasons besides previewing a render where you want certain overlays to be turned off. By the way, an overlay is an item that provides information and context to the user with regards to the scene but does not affect anything in the scene itself nor is it visible in the render.
Beginners to Blender often feel overawed by everything that is thrown at them on the screen. Most people would prefer to minimize what they can see on their software and then access those tools only when required.
Another example is when working with models that are rigged for animations you may want to hide those rigs from view, this is another element that can be hidden with the overlays button.
For me, I sometimes turn off the overlays in my viewport to get a quick preview of the scene, and then turn them back on again, as there is a lot of value in these overlays being displayed.
What Overlays Can You Turn Off Or On From The Menu?
Next to the overlays button, you will find an arrow that opens up the overlays menu, where you will be able to turn on and off specific elements in the 3D viewport.
For example, you will see in Blender a red line to indicate the X-axis and a green line to indicate the Y axis, however, there is no line for the Blue axis as this is turned off by default. But in the overlays menu, you can control the visibility of the axis lines individually.
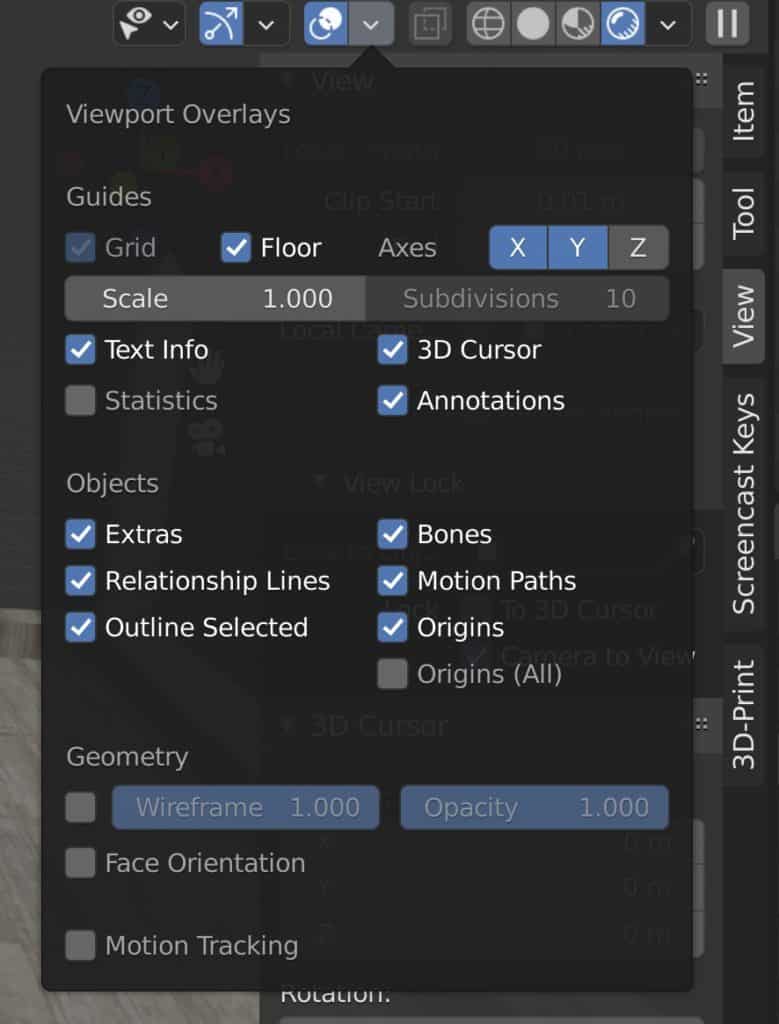
You can also control the visibility and scale of the Blender grid, which is often one of the main things that users normally want to hide. The Blender grid is based on the currently selected unit of measurement, and so the scale value is comparable to that measurement. For example at a scale of 1 when meters are used, each square will be 1 meter in each direction.
Most of the overlays here are turned on by default, in particular those related to the selected object, like the object origin.
Towards the bottom, you have two very handy overlays for object geometry that are switched off. The first creates a wireframe overlay which is very useful for displaying the geometry of the model in object mode. This way you can also view how your modifiers affect your topology.
Then you have the face orientation overlay. In 3D space, a face has two sides, an inward-facing side, and an outward-facing side, based on the direction of its normals. When you turn this overlay on your geometry will appear as one of two colors, either red or blue.
You want to only be able to see the color blue in your scene, as seeing red indicates incorrect normals, which will need to be fixed before sending models over to game engines.
You can learn more about normals and how to fix them by reading our article on the topic here.
-
Blender Kitbashing: Complex Shapes Made Easy
Simplifying complex shape creation with Blender’s kitbashing approach.
-
Custom Normals: Blender Hard Surface Tip
Enhancing hard surface models with custom normals for realism.